
Need help applying this to your account?
Contact support and we will keep this article attached to your request.
This is useful when you want to confirm that a conversion is still valid before sending a referral reward.
Reward delay options after qualification
When a Lead becomes Qualified, the related reward is created.
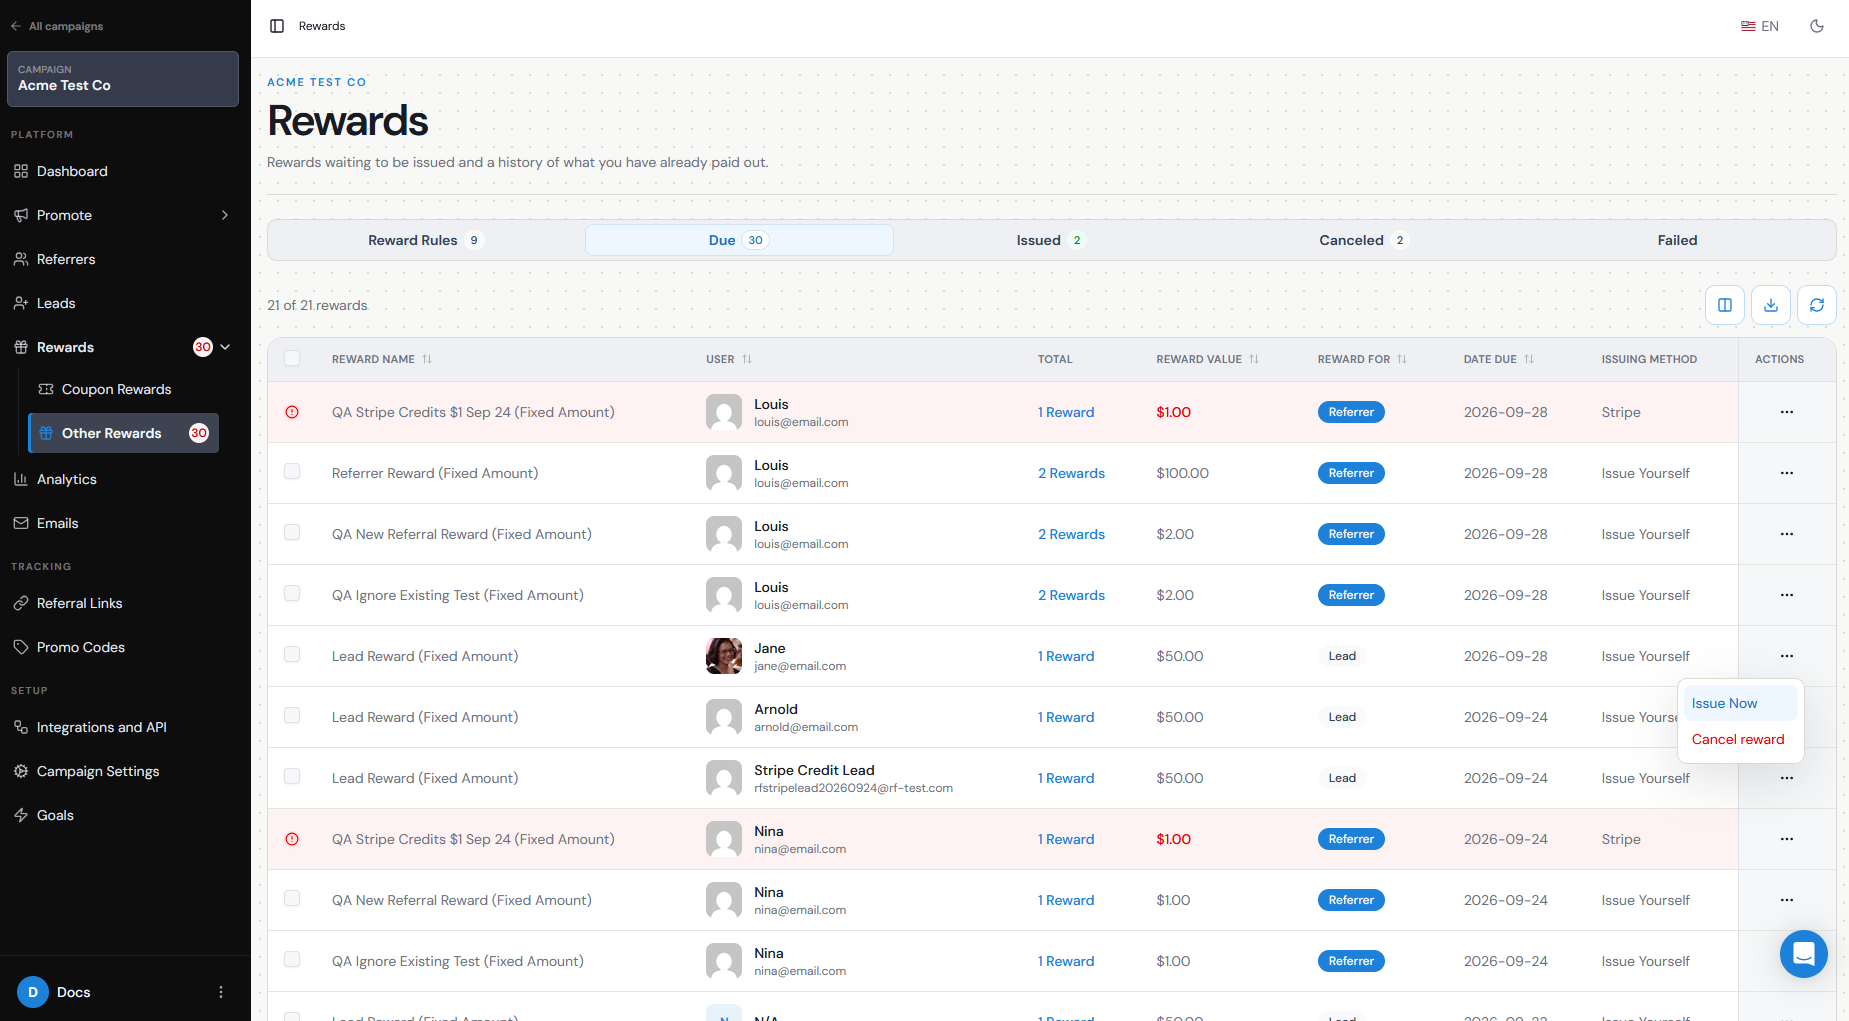
If Auto Issue is turned off, the reward moves to Rewards → Due and waits there until you issue it manually.
This gives you control over how long you wait before sending the reward.
For example:
Lead qualifies → Reward becomes Due → Wait 30 days → Review the conversion → Issue the reward
To use this approach:
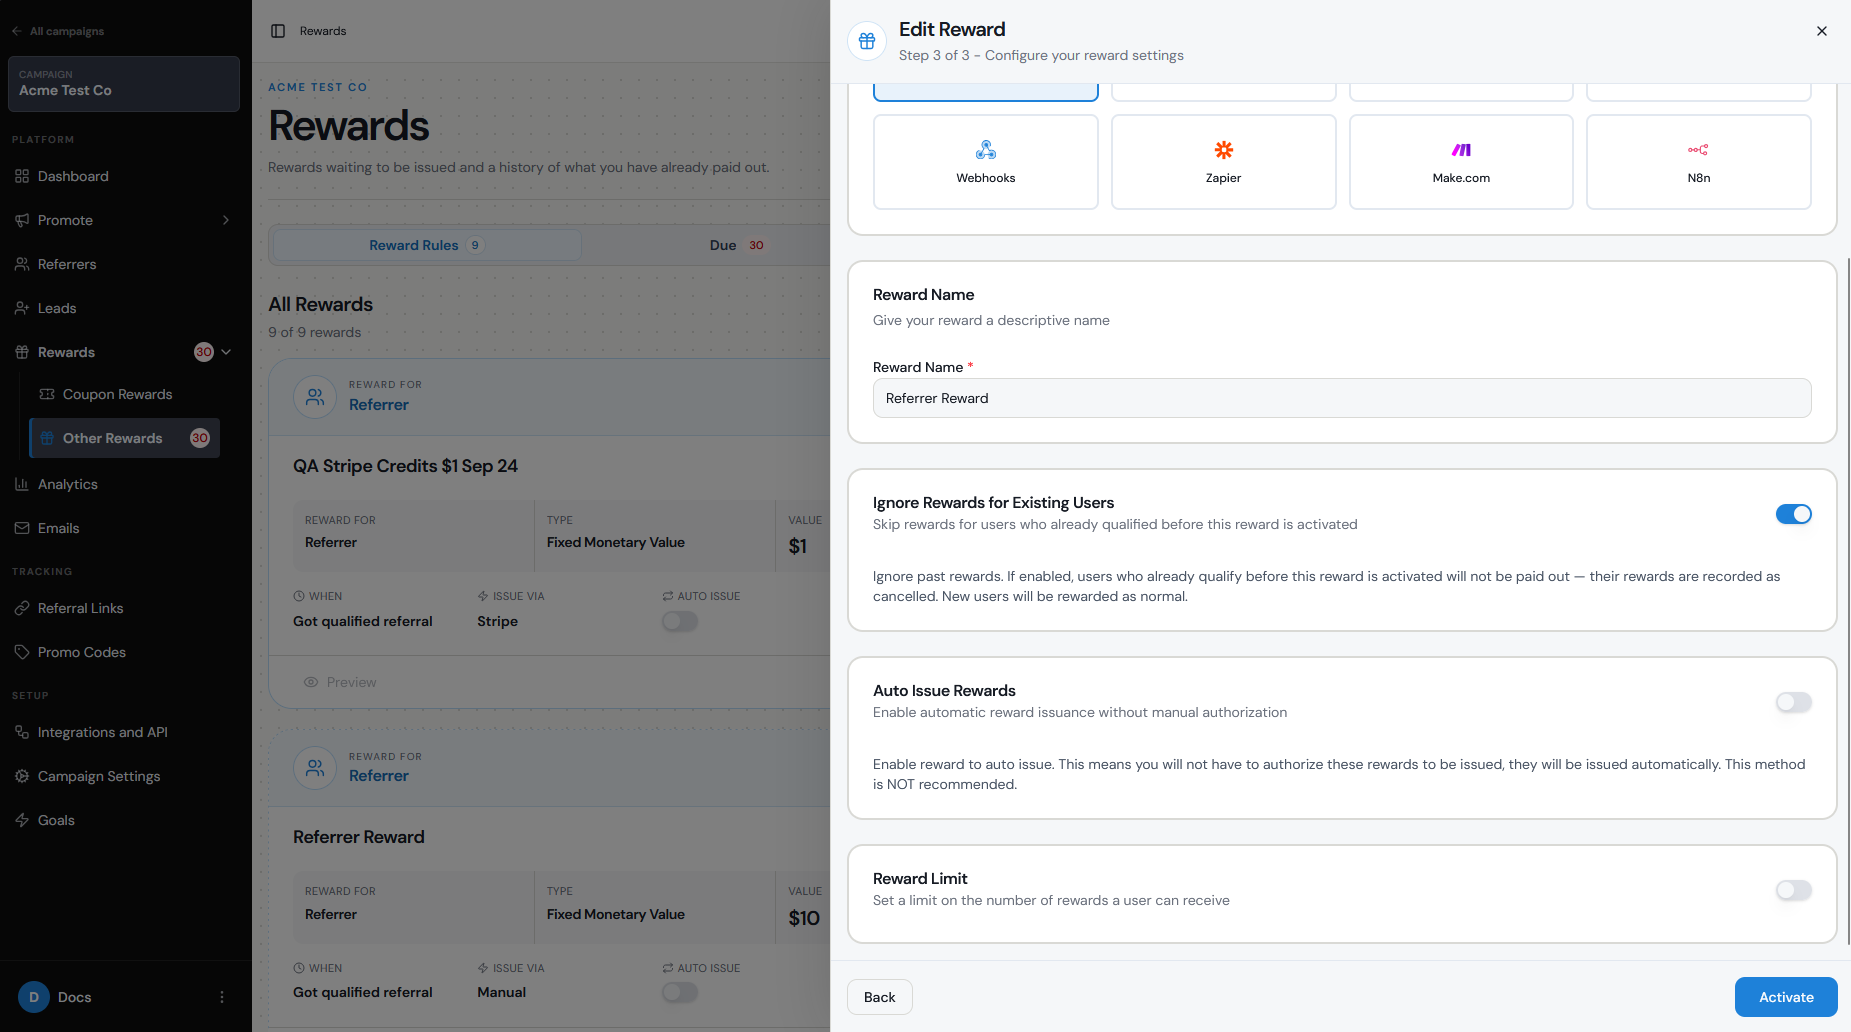
Go to Rewards.
Open Manage Rewards.
Edit the reward you want to configure.
In Step 3, make sure Auto Issue Rewards is turned off.
Save or activate the reward.
The reward will then remain in Due until you manually issue it.
Why businesses use them for return/cancellation windows
Many businesses do not want to issue a reward immediately after a customer converts.
A waiting period gives you time to identify situations such as:
Refunds
Order cancellations
Subscription cancellations
Chargebacks
Fraudulent or invalid referrals
For example, if your customers have a 30-day refund period, you may choose to leave the reward in Due for 30 days before issuing it.
This allows you to qualify the Lead as soon as the conversion happens while still protecting your reward budget if the transaction is later reversed.
How delay affects status and payout timing
The Lead and the reward have separate statuses.
Once the conversion happens, the Lead can still become Qualified immediately.
The reward, however, remains Due while you wait.
So your workflow can look like this:
Lead: Pending → Qualified
Reward: Due → Issued
Keeping a reward in Due does not mean the Lead is still waiting to qualify. It simply means the reward has been earned but has not yet been sent.
When your waiting period has passed and you are satisfied that the conversion is valid, go to Rewards → Due and issue the reward.
Changing/cancelling before issue
The main advantage of delaying a reward is that you still have time to review the conversion before the reward leaves your business.
If the Lead receives a refund, cancels, or should no longer count as a successful referral, you can Unqualify the Lead and return their status from Qualified to Pending.
If the reward has not yet been issued, review the related entry in Rewards → Due before taking any further action.
If you need to change the reward configuration itself, keep in mind that active reward rules may have restrictions once rewards have already been issued. In some cases, you may need to deactivate the existing reward and create a new one rather than editing a reward that has already been used.
Once a reward has already been Issued, delaying or unqualifying the Lead will not automatically recover a payout that has already been sent through a reward provider.
Test the flow
Before launching your campaign, test the delayed reward journey from beginning to end.
Create a test Referrer and Lead.
Qualify the test Lead.
Confirm that the reward appears under Rewards → Due rather than being issued automatically.
Check that the Lead still shows as Qualified.
Test issuing the reward manually when you are ready.
If relevant, test what happens when you unqualify the Lead before issuing the reward.
This confirms that qualification, reward creation, and manual issuing are working independently.
If your business has a refund or cancellation window, keeping Auto Issue off is the simplest way to create a review period between conversion and payout.