
Need help applying this to your account?
Contact support and we will keep this article attached to your request.
Overview
This guide covers the complete setup: choosing the campaign, opening the Sticky Bar configuration, designing the banner, editing the referral form and email, controlling where and when the bar appears, and installing it safely. You do not need to install anything until the final step. After installation, you can promote the referral program to existing customers.
When to use the Sticky Bar
The Sticky Bar works particularly well in logged-in products and SaaS applications where customers are already using your website or app. It stays visible without requiring customers to find a separate referral page, while the close and display controls help limit disruption.
Before you start
Make sure you have access to the Referral Factory campaign you want to promote. You will also need a developer or website administrator for the final installation because the Publish & Install step uses a backend request and website JavaScript. Never expose the Sticky Bar secret in browser-side code.
Open the Sticky Bar configuration
Select the campaign. From the Referral Factory dashboard, open the campaign you want to configure before opening campaign-level promotion tools.
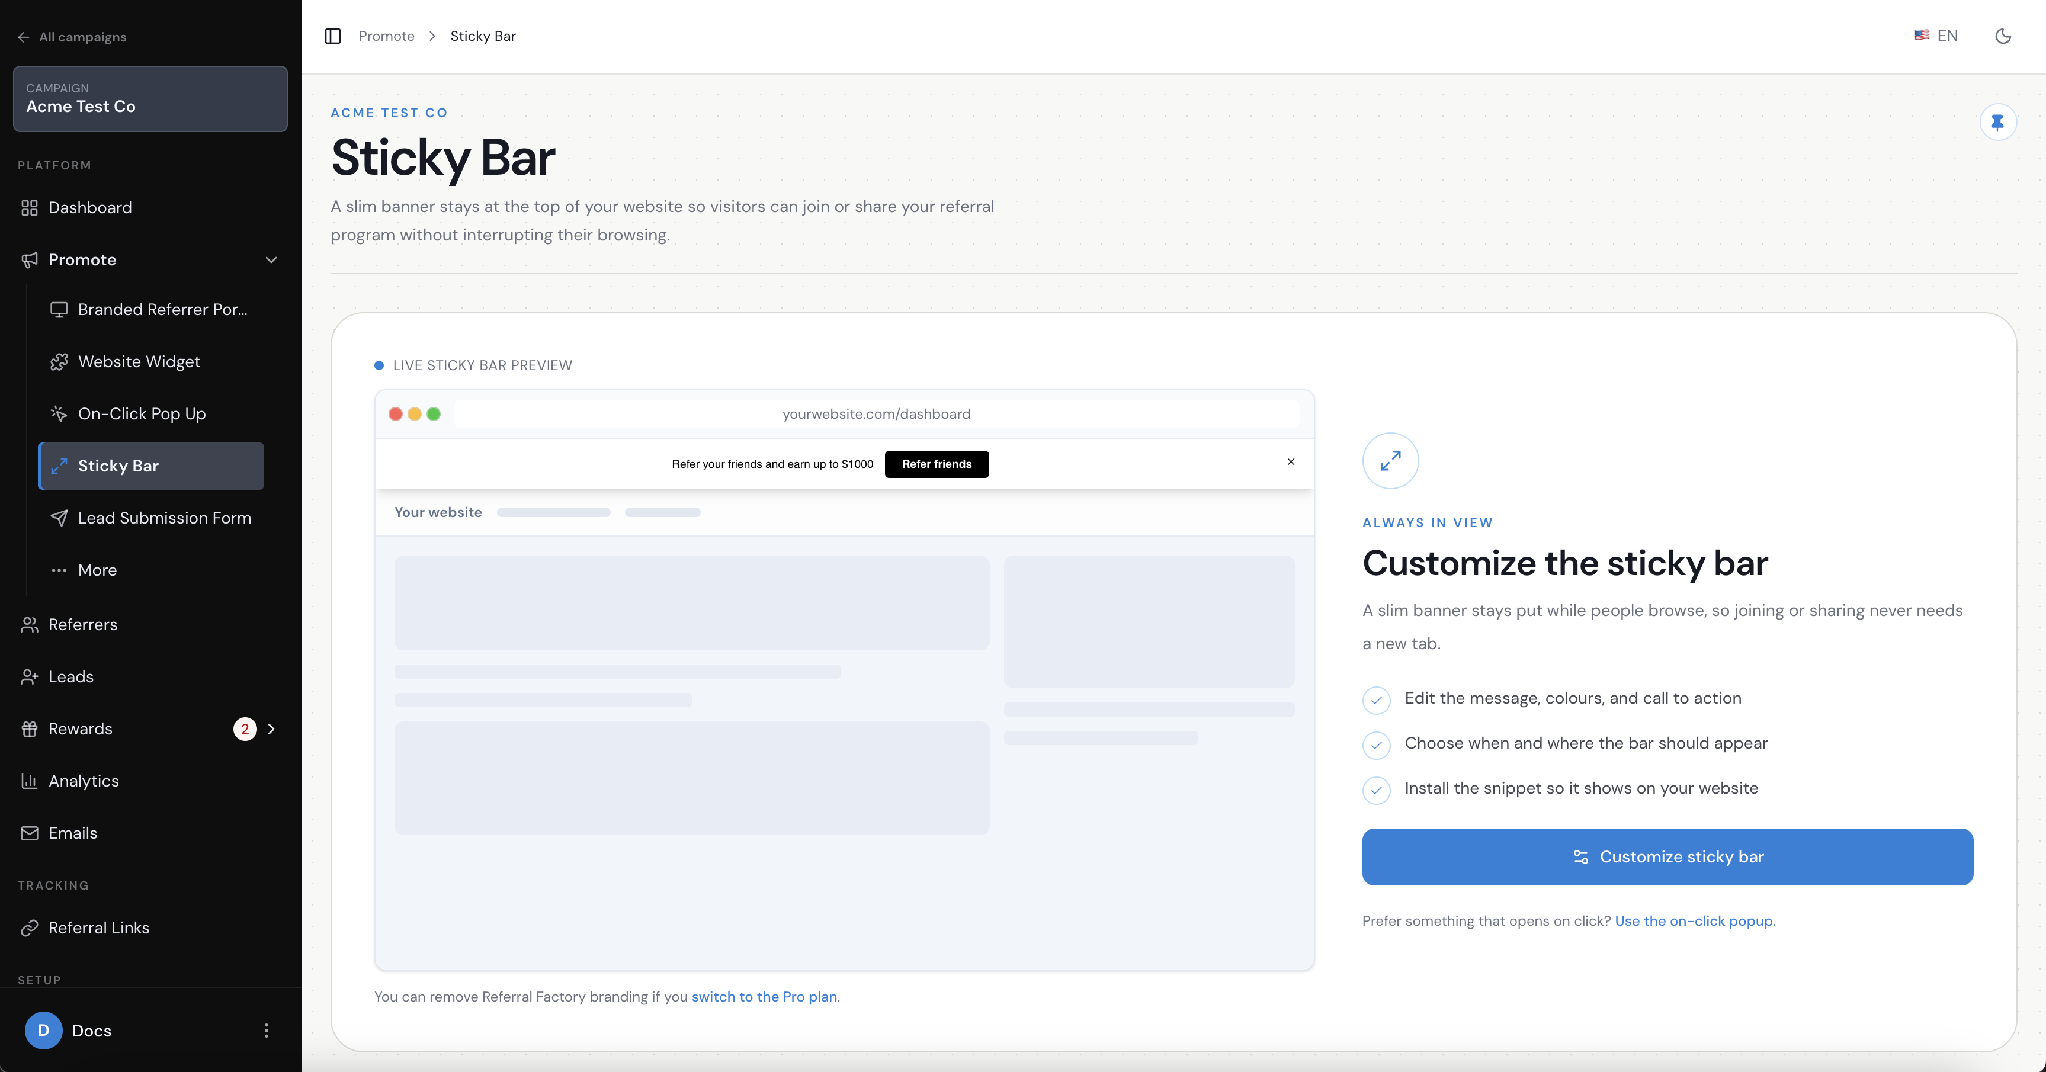
Open Promote. In the selected campaign, open Promote and find Sticky Bar under the ways to onboard referrers who are already logged in.
Sticky Bar page on the Promote menu
Open Sticky Bar Configuration. Open the Sticky Bar card and select its configuration action. If the Sticky Bar is hidden from the sidebar, use the eye icon on the Promote card to show it first.
The configuration has two steps: Design Banner and Publish & Install. Use Next and Previous at the bottom of the panel to move between them.
Design the Sticky Bar
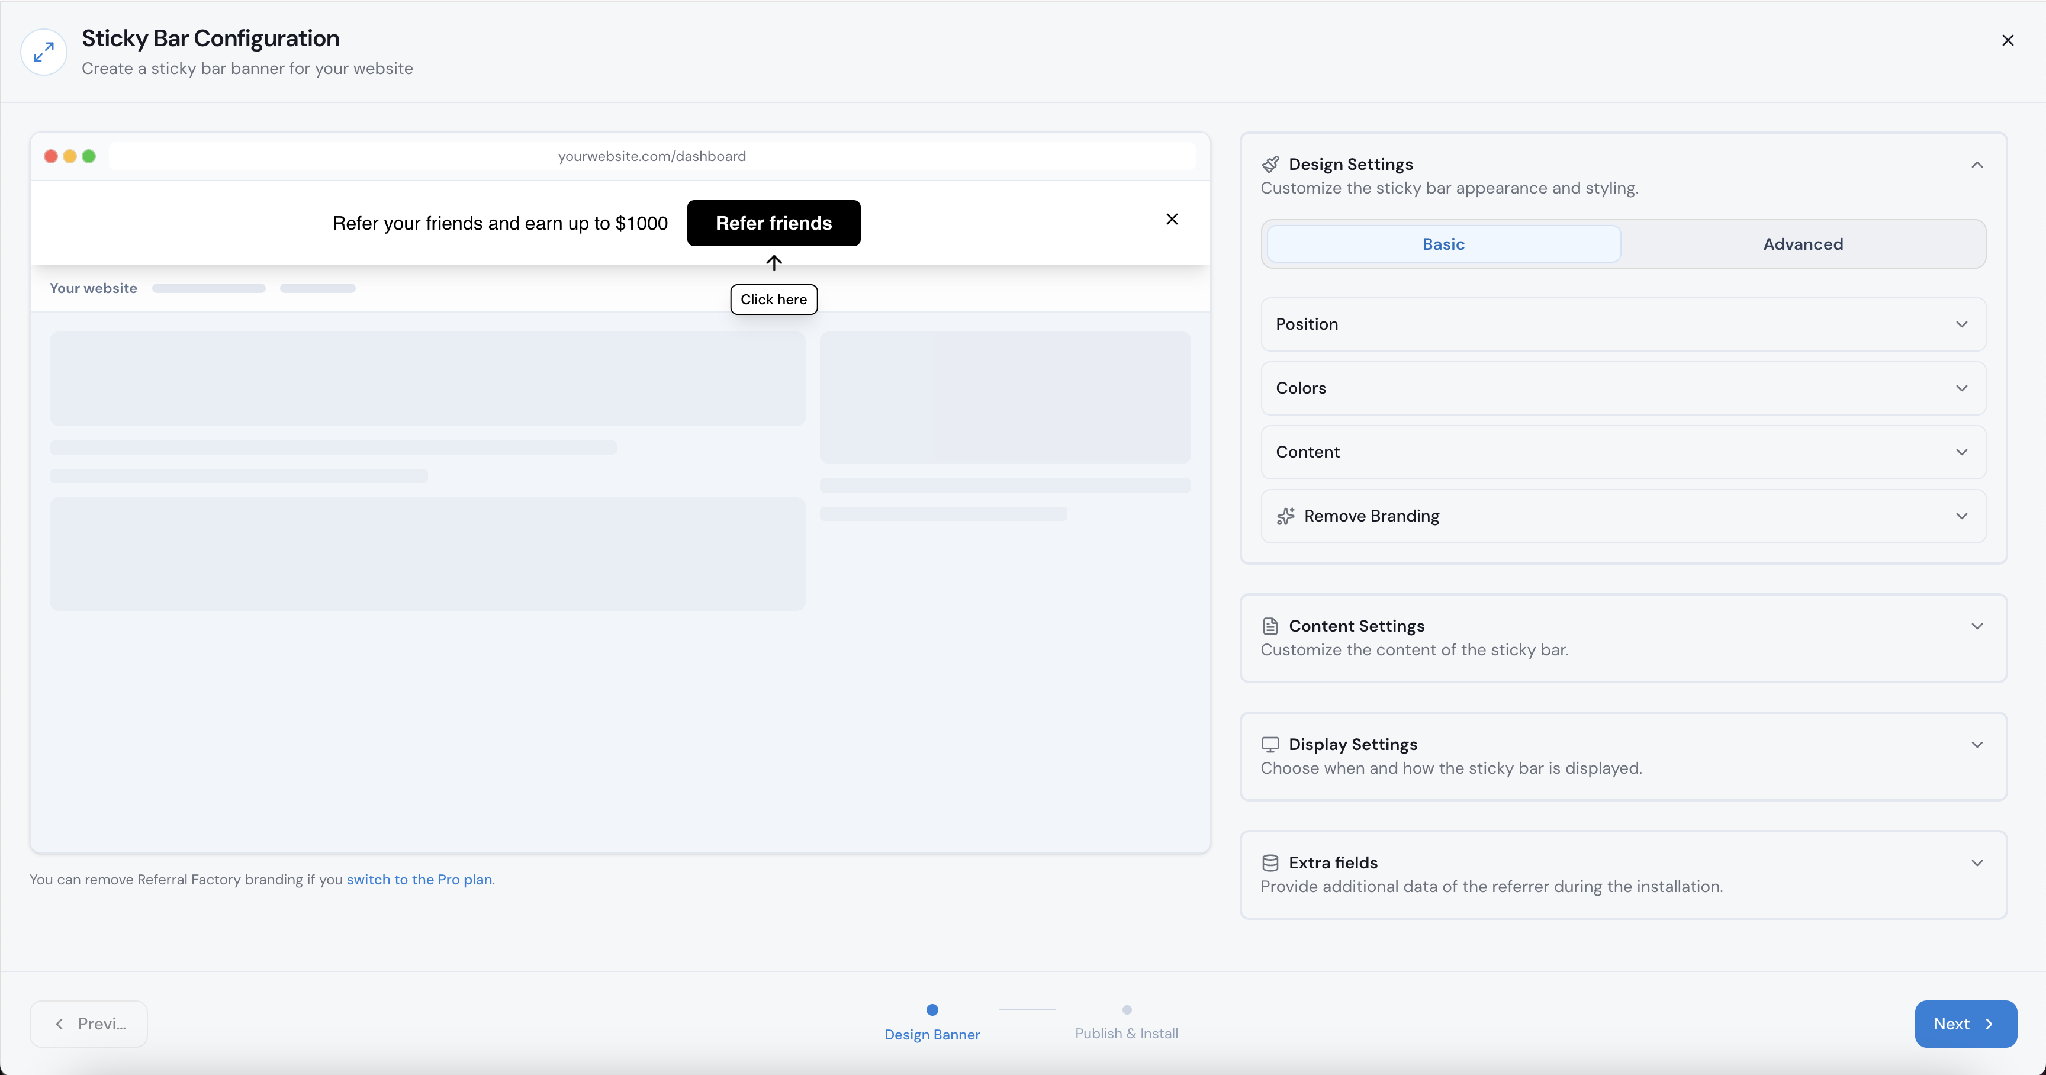
Start with Basic settings. Use the Basic design controls to set the main appearance of the banner. Check the live preview as you make changes so the banner remains readable against your website.
Sticky Bar Design Settings with Basic selected
Use Advanced settings for more control. Open Advanced to work through the detailed design sections. These controls let you adjust the bar position, colors, content styling, background, title, text, button, link and form field appearance.
Sticky Bar Design Settings with the referral form preview
Choose the position and visual styling
Set the bar position. Open Position and choose Top of the Page or Bottom of the Page.
Set the colors and typography. Use Colors to set the background, text, button, button text and link colors. Use Content for the font and button border radius. Expand the individual Advanced sections if you need separate settings for the title, text, button, link or form fields.
Edit the Sticky Bar content and referral form
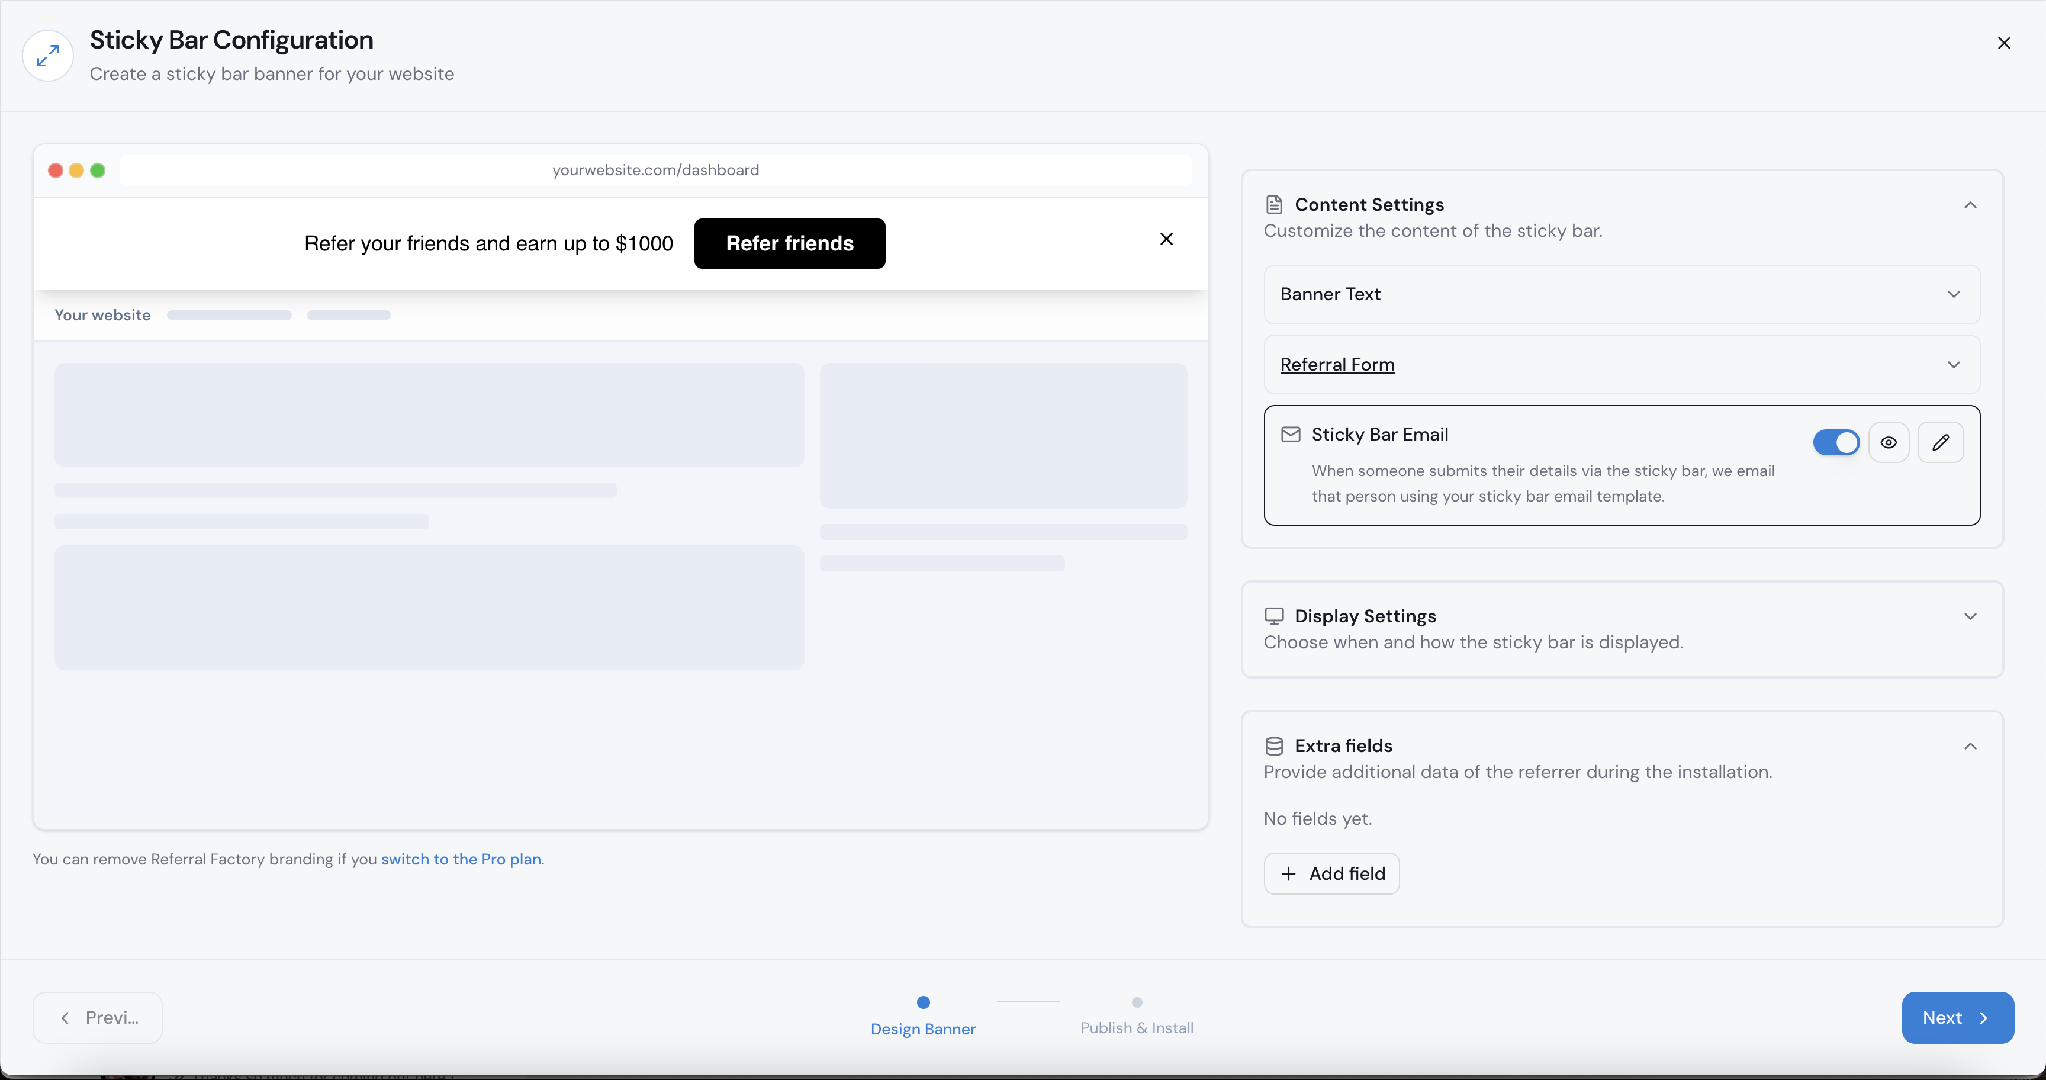
Open Content Settings. Edit the Banner Text and Button Text shown on the Sticky Bar. Keep the message short and make the button action clear.
Configure the referral form. Set the Form Title, Form Description, Friends Details Label, Friend Name Label, Friend Email Label, Reward Text and Consent Text. The form can accept multiple friends; use + Add more Friends to add rows when testing the experience.
Configure the referred-friend email. Set the Email Subject and Email Body sent when a referrer submits a friend’s details. Use the available personalization variables, such as {name} for the referred friend and {yourName} for the referrer.
Sticky Bar Email enabled inside Content Settings
Control when the bar appears
Open Display Settings. Choose the pages where the bar appears. The default is All Pages.
Set the timing and close behavior. Set Delay Before Showing in seconds. Decide whether to Show Close Button. If you enable Hide After Close, set Hide Duration in hours so the bar stays hidden for the chosen period after a referrer closes it.
Publish and install the Sticky Bar
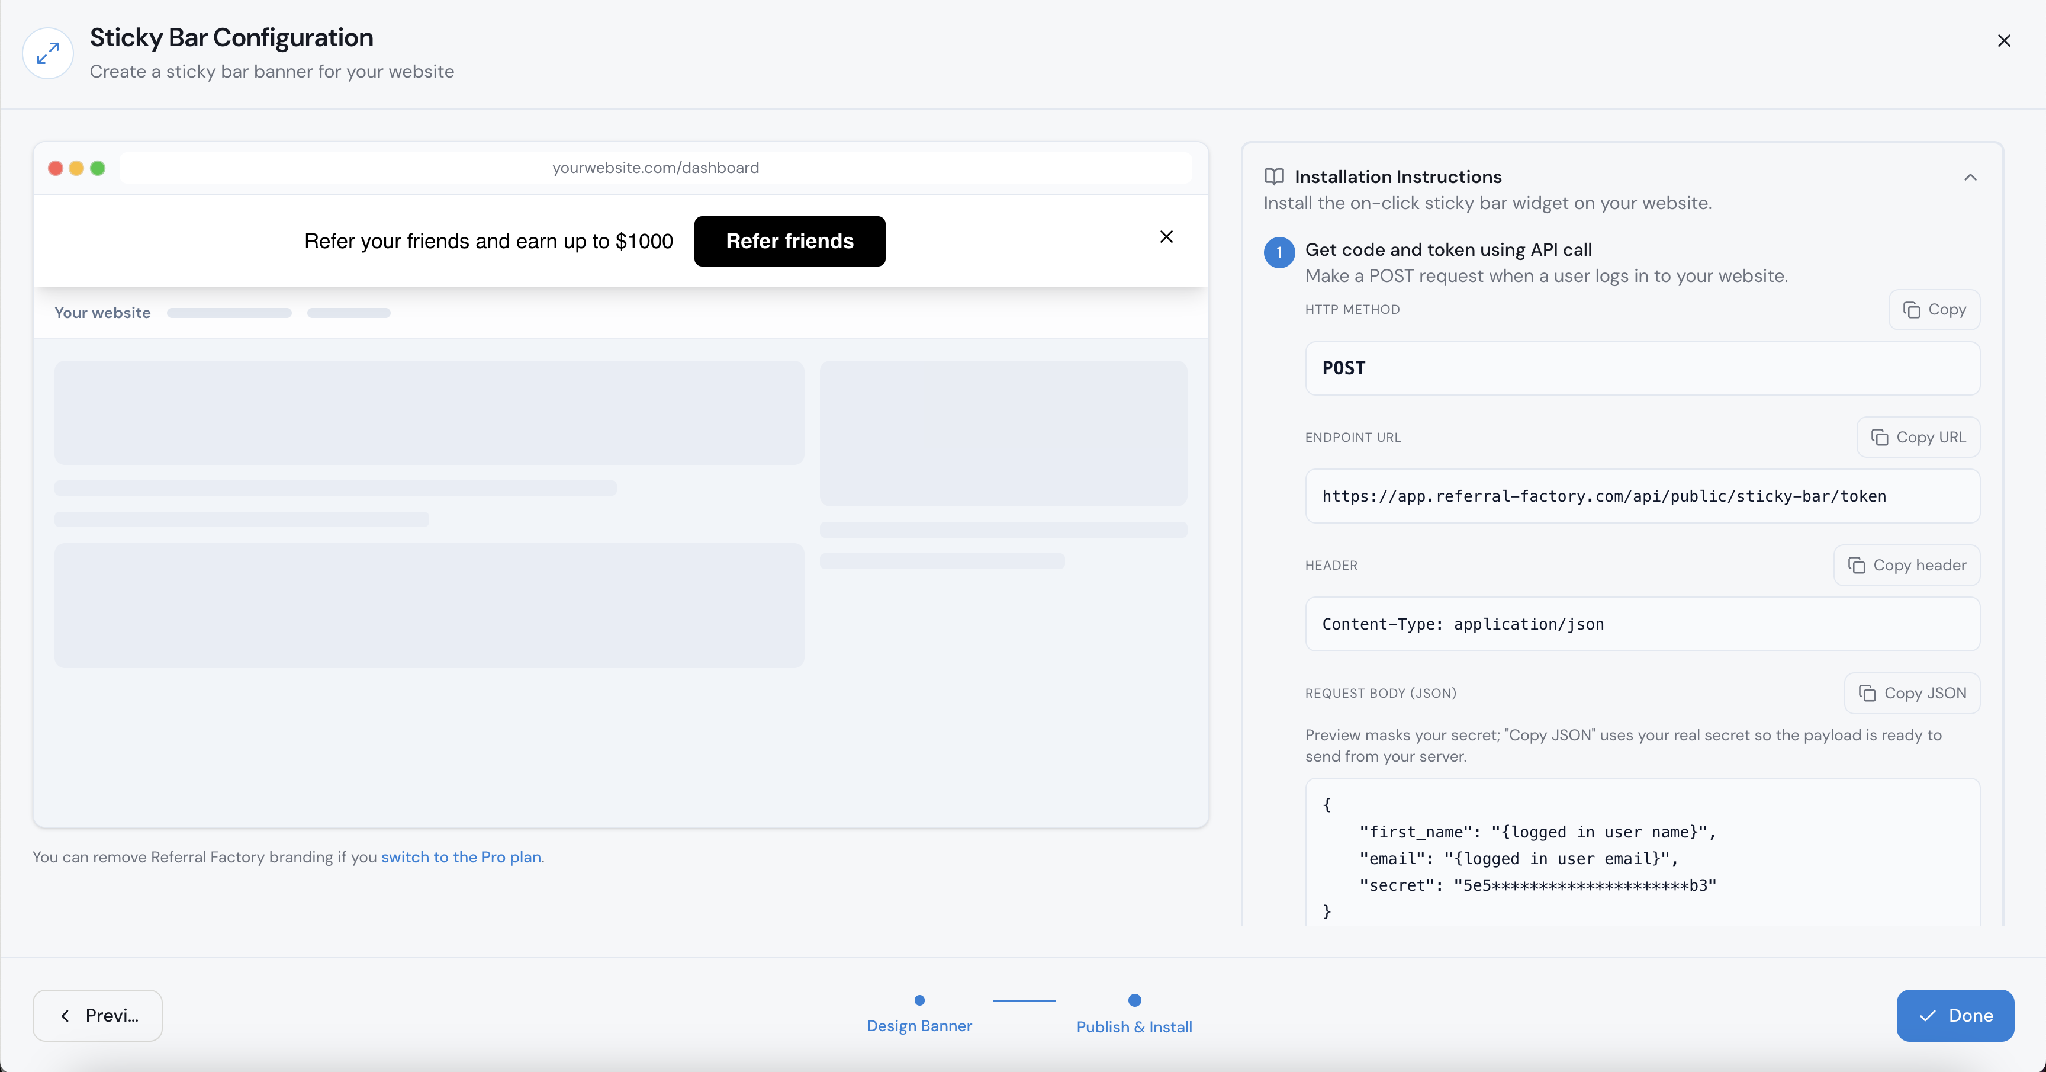
Open Publish & Install. Select Next to move to the installation step. Review the code and token instructions before involving your developer or website administrator.
Sticky Bar Installation Instructions
Retrieve the user code and token on your backend. When a user logs in to your website, make the documented POST request using the user’s first name, email and Sticky Bar secret. The response returns the code and token for that user. These identify the logged-in customer so referrals submitted through the Sticky Bar can be attributed to the correct referrer.
Add the provided JavaScript to your website. Replace the placeholder values in the supplied snippet with the returned code and token, then place the snippet before the closing </body> tag. Save and publish your website changes only when you are ready to make the Sticky Bar available to customers.
Test before making it available
Before launch, test the Sticky Bar in a safe environment. Confirm that it appears on the correct pages, opens the referral form, accepts referrals correctly, displays the right content and reward messaging, and respects your delay and close settings. Also confirm that the Sticky Bar secret remains private on your backend.
Frequently asked questions
Can the Sticky Bar collect more than one friend at a time?
Yes. The referral form supports multiple friends. Select + Add more Friends to add another name and email row.
Can I change the email sent to the referred friend?
Yes. Open Content Settings and edit Email Subject and Email Body. The email body supports personalization variables such as {name} and {yourName}.
Do I need to install the Sticky Bar to preview the design?
No. You can configure and review the preview before installation. The final Publish & Install step is where your developer adds the backend request and JavaScript to your website.