
Read this page as a quick path: scan the headings, use the step blocks, and escalate if the expected result does not happen.
Need help applying this to your account?
Contact support and we will keep this article attached to your request.
The sticky bar is a persistent banner that sits at the top or bottom of your product and constantly prompts customers to refer their friends. When a visitor clicks the banner button, a referral form opens where they can submit a friend's details directly. Because it's always visible, it generates referral awareness without requiring customers to actively seek it out.
Accessing the sticky bar configuration
There are two ways to open the Sticky Bar Configuration:
The configuration has two steps: Design Banner (appearance, content, and display rules) and Publish & Install (get the code). Use the Next and Previous buttons at the bottom to move between steps.
- From the Promote page — Click the Sticky Bar card under "Ways to onboard referrers — if they are logged in" and then click Sticky Bar Configuration.
- From the sidebar — Go to Onboard Referrers → Sticky Bar. If you don't see it in the sidebar, you can enable it from the Promote page using the eye icon on the Sticky Bar card.
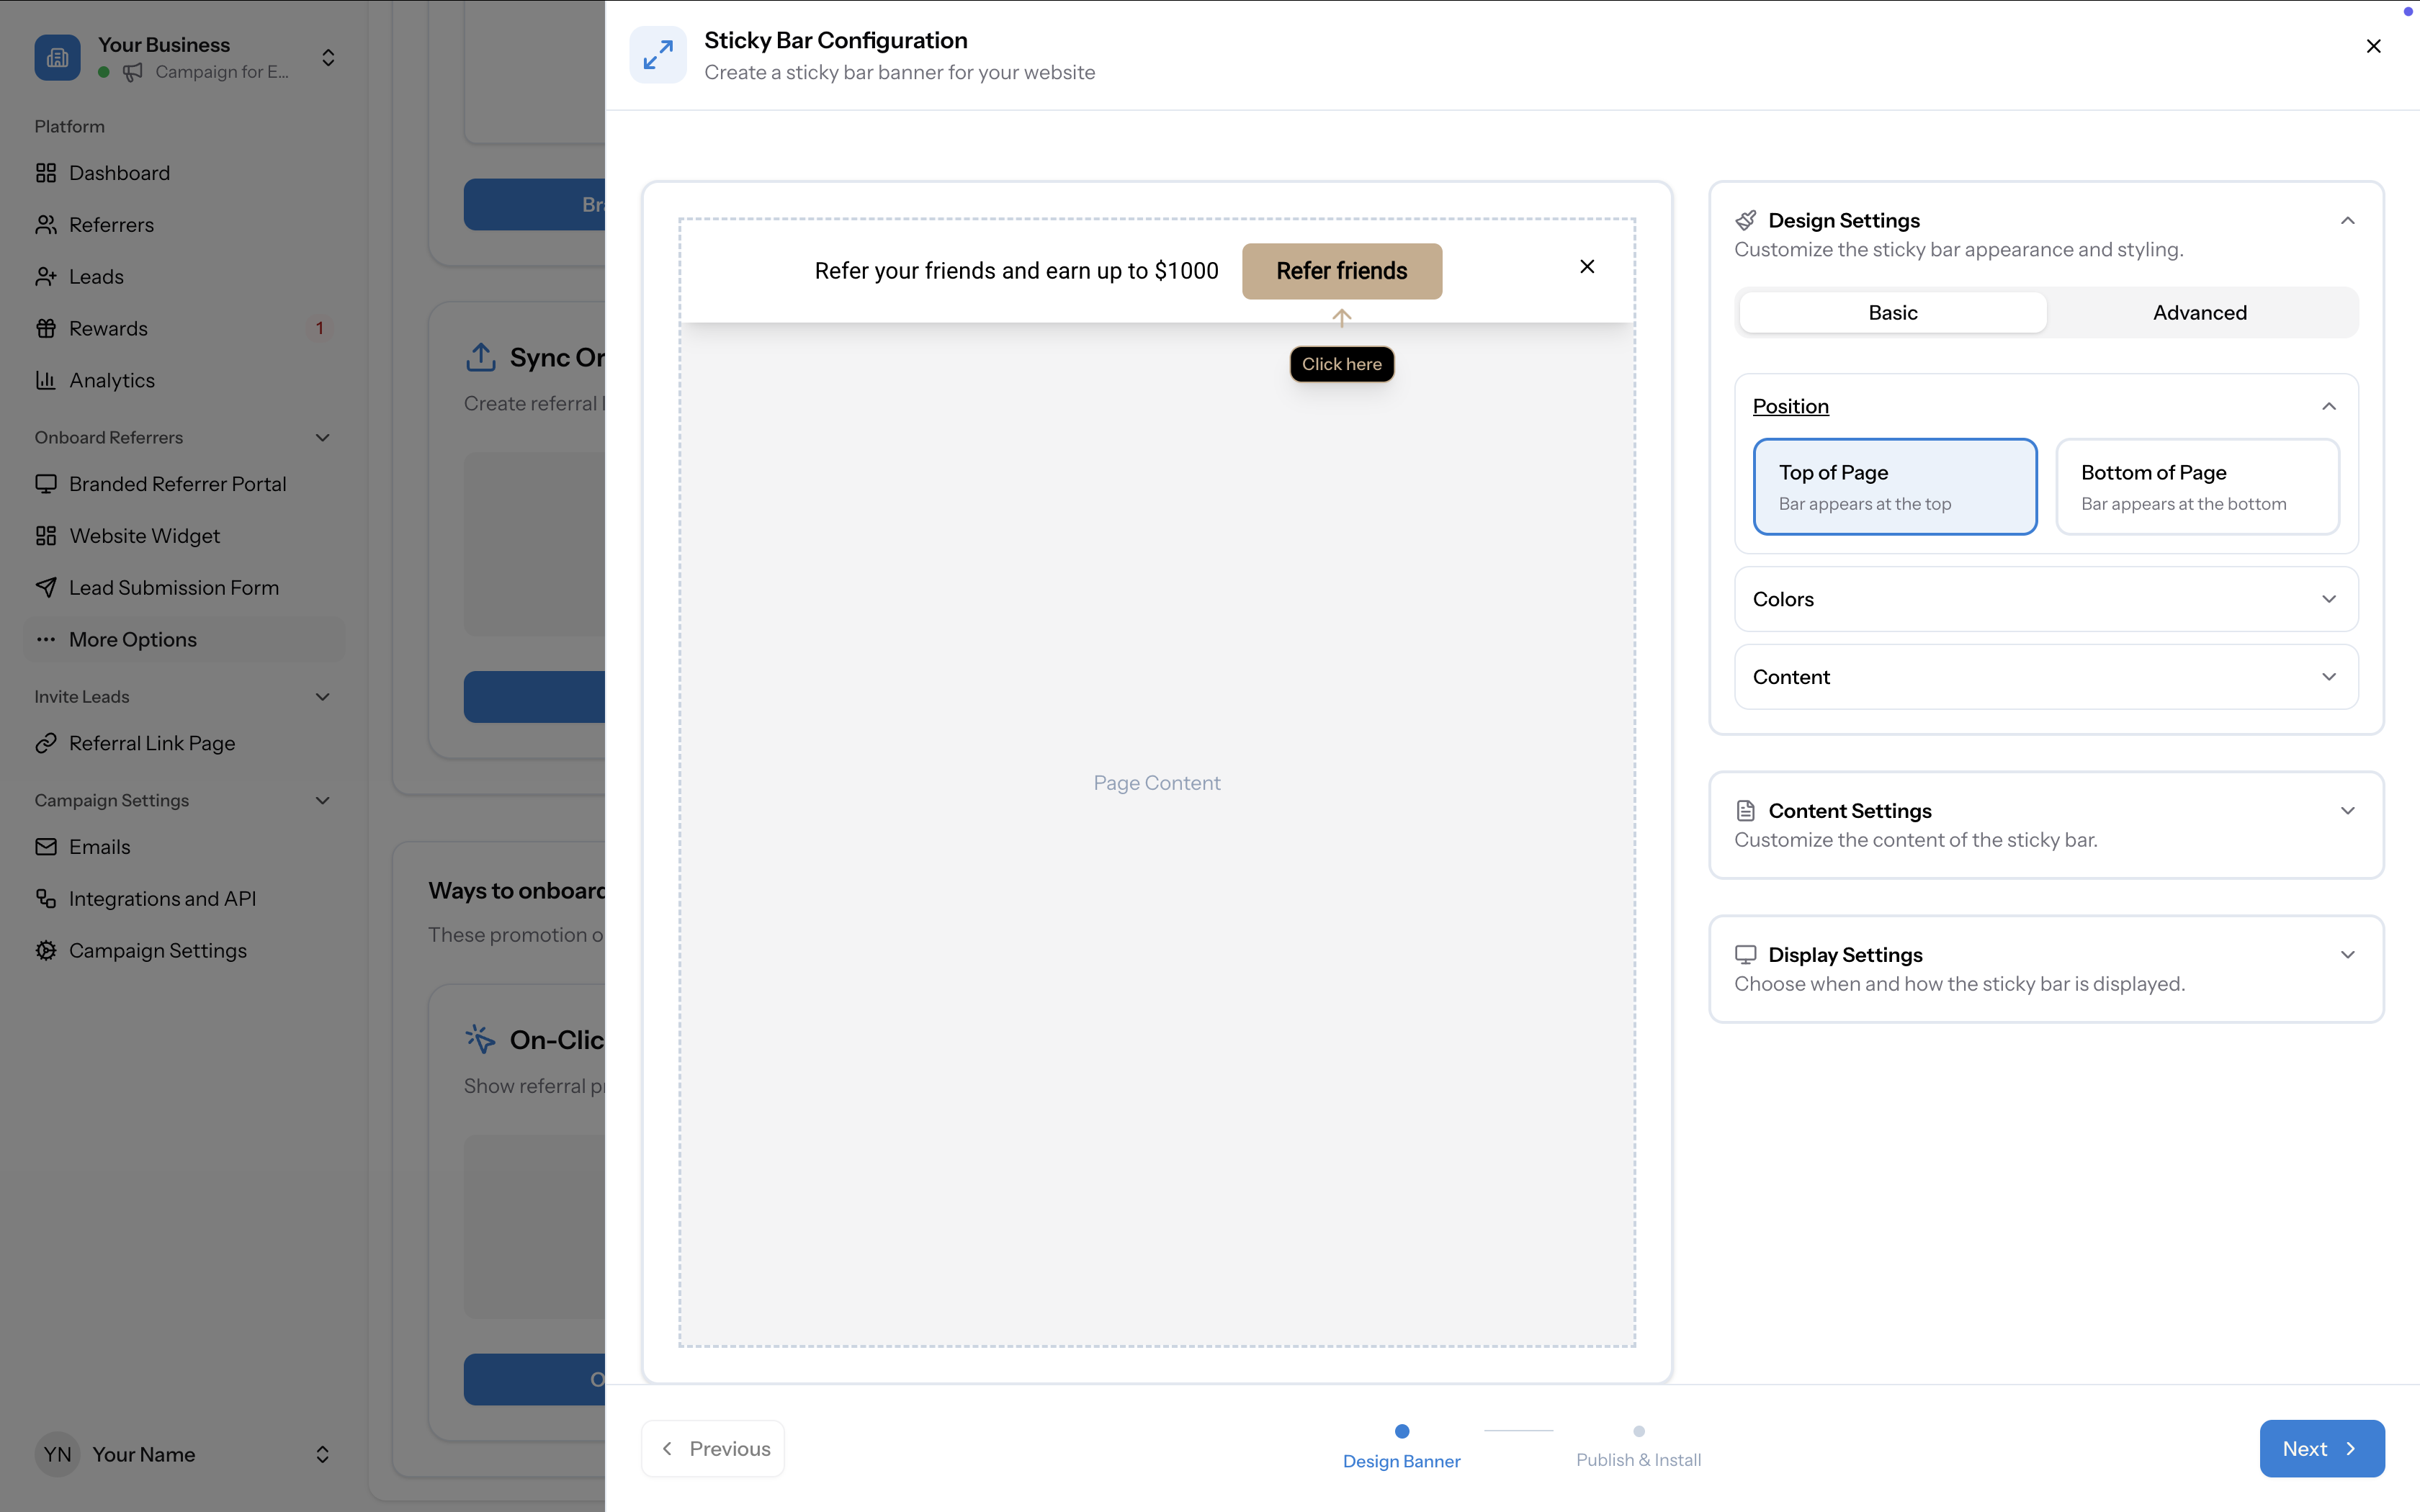
Design Settings
Design Settings control the bar's visual appearance. There are two sub-tabs:
Basic — style the core elements with simplified controls:
Advanced — for more granular styling, expand individual sections:
- Position — choose where the bar appears: Top of Page or Bottom of Page
- Colors — set Background Color, Text Color, Button Color, Button Text Color, and Link Color
- Content — set the Font (applies to all text and button elements) and Button Border Radius
- Background — background colour
- Title — font, size, colour, and formatting
- Text — font, size, colour, and formatting
- Button — font, size, background colour, text colour, border radius, and formatting
- Link — link colour
- Form Field — font, text colour, background colour, border colour, and border radius
Content Settings
Content Settings control the text displayed on the banner and in the referral form that opens when visitors click the button. There are three sub-sections:
The text shown on the sticky bar itself:
When a visitor clicks the banner button, a referral form opens. Configure every element of this form:
The form supports submitting multiple friends at once. Each row includes a name and email field plus the reward value. Click "+ Add more Friends" to add additional rows.
Configure the notification email sent to the referred friend when their details are submitted:
- Banner Text — the main message displayed on the bar (e.g. "Refer your friends and earn up to $1000")
- Button Text — the label on the CTA button (e.g. "Refer friends")
- Form Title — rich text editor for the form heading (e.g. "Refer your friends and earn up to $1000")
- Form Description — rich text editor for the description text explaining the referral offer and rewards
- Friends Details Label — label above the form fields (e.g. "Enter your friends details")
- Friend Name Label — placeholder text for the name field (e.g. "Friend name")
- Friend Email Label — placeholder text for the email field (e.g. "Friend email")
- Reward Text — text showing the reward value (e.g. "~ worth $200")
- Consent Text — the consent message shown with a checkbox (e.g. "I consent to you sending an email to these customers on my behalf")
- Email Subject — the subject line (e.g. "{yourName} asked us to contact you")
- Email Body — rich text editor with formatting toolbar for the full email content. Uses personalisation variables like {name} (the referred friend) and {yourName} (the referrer)
Display Settings
Display Settings control when and how the sticky bar appears on your website.
- Show On Pages — choose which pages the bar appears on (default: "All Pages")
- Delay Before Showing (seconds) — how long to wait before showing the bar after a page loads (default: 0)
- Show Close Button — toggle on/off to allow users to close the bar
- Hide After Close — toggle on/off. When enabled, the bar won't reappear after a user closes it (for the duration specified below)
- Hide Duration (hours) — how long to hide the bar after a user closes it (e.g. 24 hours)
Step 2: Publish & Install
Click Next to move to the Publish & Install step. This provides the installation instructions to add the sticky bar to your website.
1. Get code and token using API call
When a user logs into your website, make a POST request to retrieve a unique code and token for that user:
Request:
POST https://app.referral-factory.com/api/public/...Include the user's first name, email, and your sticky bar secret in the request body (JSON format with
Content-Type: application/json).Response:
The API returns a
code and token for that user.Your sticky bar secret is shown on this page with a Copy button. Keep it safe.
⚠️ IMPORTANT: Make this request from your backend only. Never share the sticky bar secret with anyone.
2. Add code and token to JavaScript
Use the code and token from the API response in the JavaScript snippet provided. The snippet configures the
window.referralFactory object with a stickyBar property containing the credentials, and loads the Referral Factory sticky bar script.Copy the snippet, replace the placeholder values with the actual code and token from your API response, and paste it before the closing
</body> tag on your website.3. Done!
Save and publish your changes. The sticky bar will now appear on your website according to your display settings.
Best use case
The sticky bar works well inside logged-in SaaS products where you want a low-friction, always-on reminder. It requires minimal action from the customer — they see it, click it, and the referral flow opens. It's also effective on e-commerce sites for promoting referral offers to repeat visitors.