
Read this page as a quick path: scan the headings, use the step blocks, and escalate if the expected result does not happen.
Need help applying this to your account?
Contact support and we will keep this article attached to your request.
The Lead Submission Form lets referrers submit a friend's details on their behalf. Instead of sharing a link, the referrer fills in a form with their friend's name and email — and the referral is tracked automatically.
This is particularly useful for:
Each referrer has a unique submission form URL. When referrers visit that link, they see the form and can submit friends' details there.
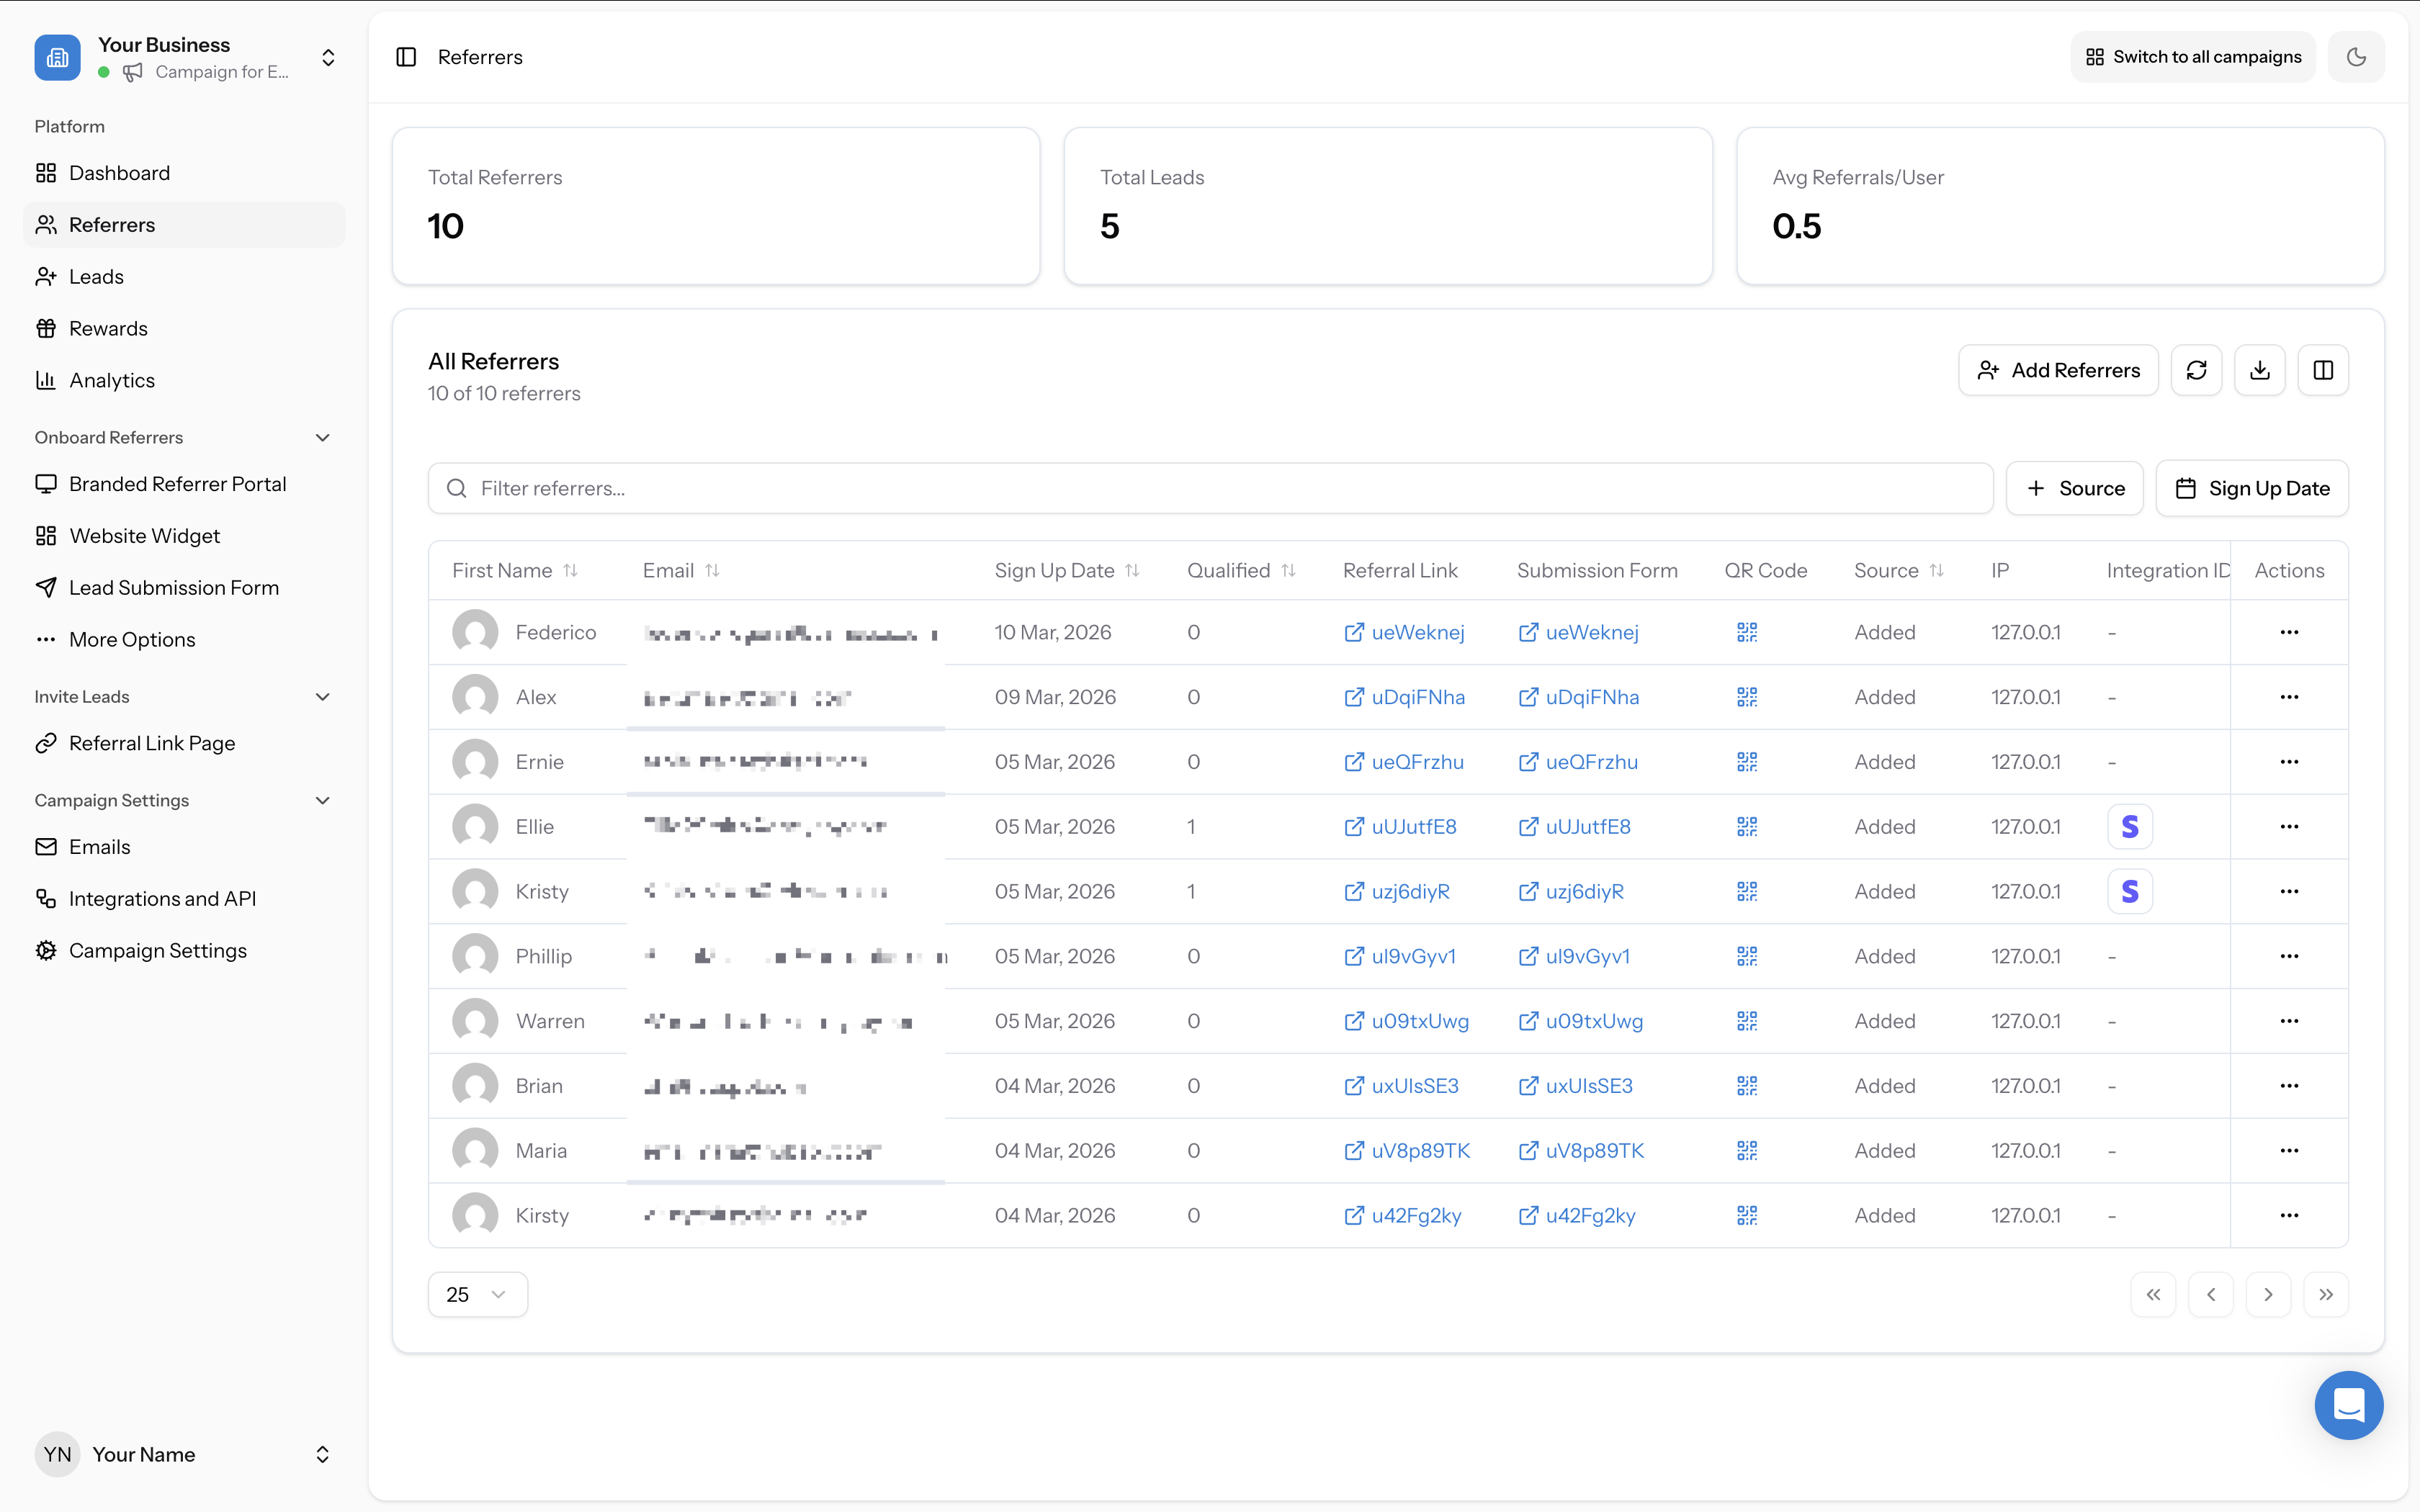
To find a specific referrer's submission form link, go to the Referrers tab in the left sidebar. The submission form URL column may be hidden by default — click the column settings icon to toggle it on. Once visible, you can copy any referrer's unique form link and share it with them directly.
- Offline businesses (salons, service providers, retail) where verbal referrals are more natural than link sharing
- Sales teams who want to track referrals they make on behalf of clients
- Any context where the referred person is less likely to click a link themselves
Accessing the submission form builder
There are two ways to open the submission form builder:
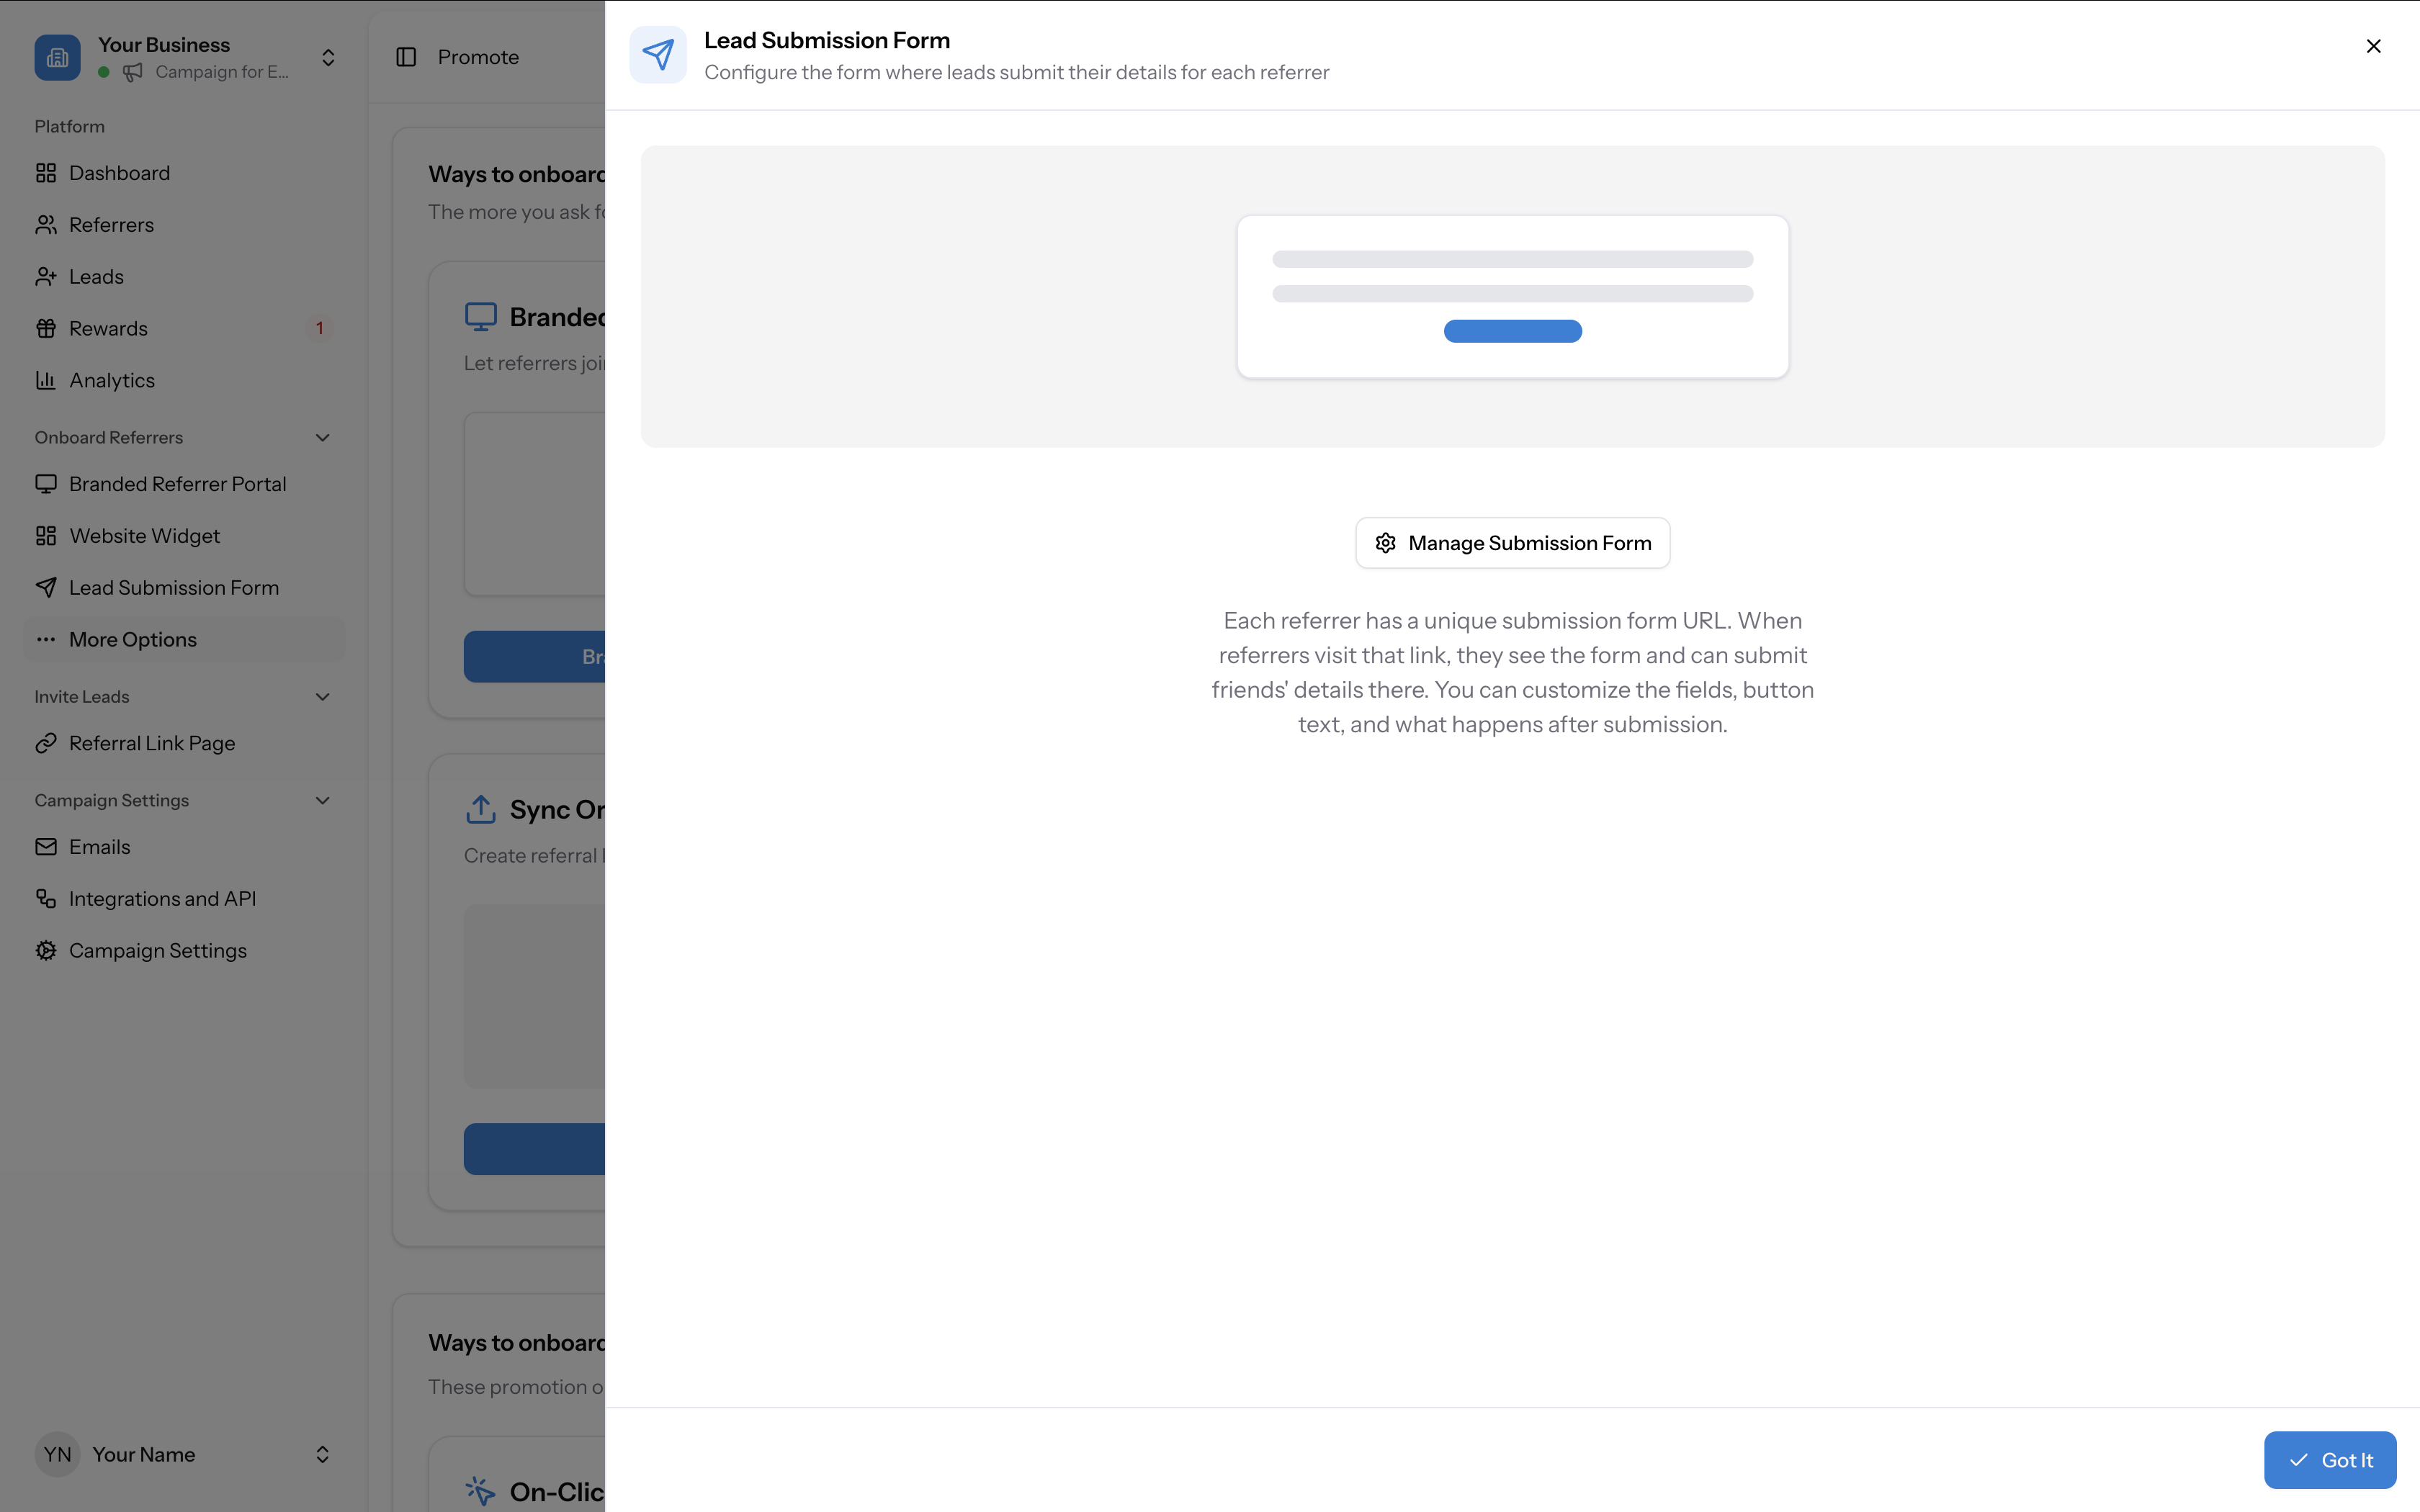
- From the Promote page — Click the Lead Submission Form card. This opens a preview panel explaining how the form works. Click Manage Submission Form to open the full builder.
- From the sidebar — Go to Onboard Referrers → Lead Submission Form in the left sidebar. If you don't see it in the sidebar, you can enable it from the Promote page using the eye icon on the Lead Submission Form card.
The builder interface
The submission form builder uses the same drag-and-drop interface as the Referral Link Page and Branded Referrer Portal builders. It is divided into:
At the top of the builder you will see:
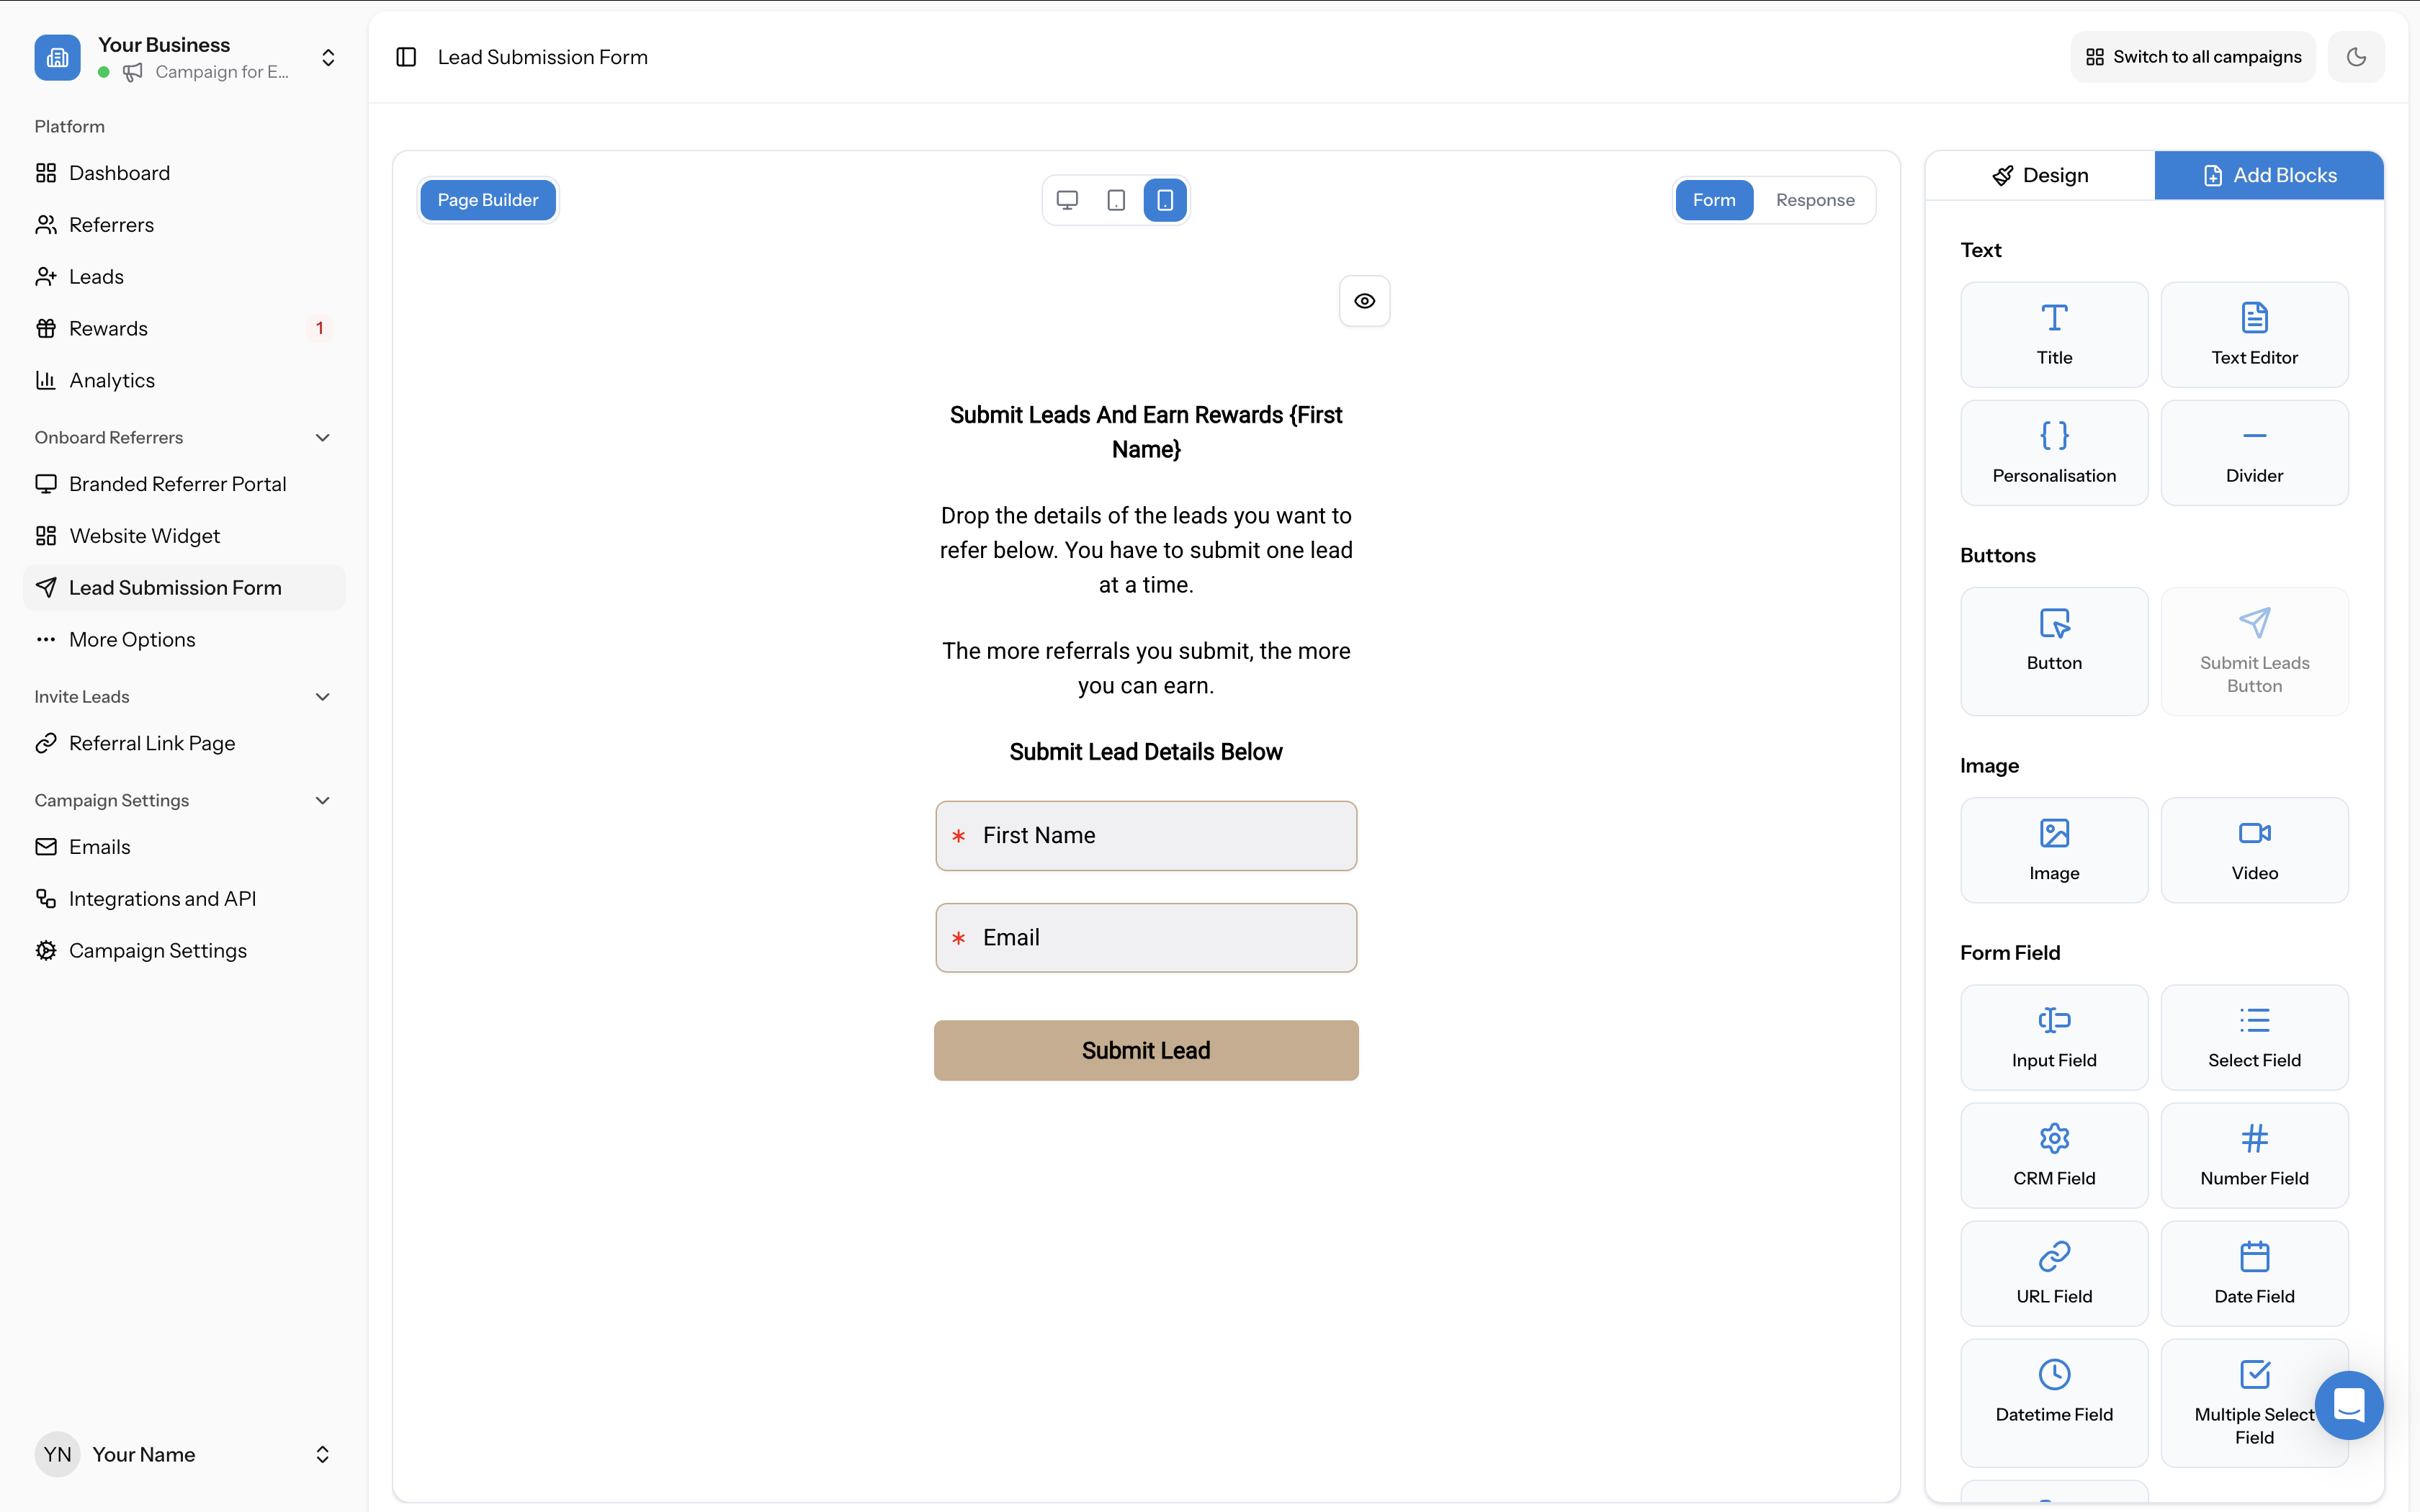
- The canvas (left) — a live preview of your form
- The right panel — with two tabs: Design (global styling) and Add Blocks (drag-and-drop content blocks)
- Page Builder tab (the drag-and-drop editor)
- Device preview icons — switch between Desktop, Tablet, and Mobile views
- Two page tabs: Form and Response — each is a separate page you can design independently
The two form pages
Form tab
The Form tab is where you design the submission form that referrers see. The default form includes:
You can customise all of this using the block editor — rearranging blocks, changing text, adding extra form fields, or adjusting the layout.
- A heading with personalisation: "Submit Leads And Earn Rewards {First Name}"
- Description text explaining that referrers can submit one lead at a time
- "Submit Lead Details Below" subheading
- First Name and Email form fields (required)
- A "Submit Lead" button
Response tab
The Response tab configures what happens after a referrer submits a lead. It contains two sections:
Thank You Message
This message is shown to referrers after they submit a lead. They will be redirected back to the form page with this message displayed. The default message is "Thank you for submitting your lead." — you can edit this to suit your brand.

Email Notifications
Toggle this on to automatically send an email to the referred person when their details are submitted. When enabled, you can configure:
The default email template includes a personalised greeting and explains why they're being contacted, using variables like {First Name} and {Referrer First Name}.
- Email Subject — the subject line of the notification email. Click Variables to insert personalisation tokens (e.g. "{Referrer First Name} asked us to contact you").
- Email Content — a rich text editor with formatting toolbar (alignment, links, bold, italic, underline, strikethrough, headings). Write the email the referred person will receive.
Available blocks
Click the Add Blocks tab in the right panel to see the blocks you can drag onto the canvas.
Text
Buttons
Image
Form Field
- Title — add a heading
- Text Editor — add body text
- Personalisation — insert dynamic tokens (e.g. {First Name}, {Referrer First Name})
- Divider — a horizontal line to separate sections
- Button — a clickable button
- Submit Leads Button — the form submission CTA (click to edit the button text)
- Image — upload an image
- Video — embed a video
- Input Field — free-text input
- Select Field — dropdown selection
- CRM Field — maps to a CRM field (available when a CRM is connected)
- Number Field — numeric input
- URL Field — URL input
- Date Field — date picker
- Datetime Field — date and time picker
- Multiple Select Field — multi-choice selection
Personalisation Variables
Click the Variables button (available in the Email Notifications section on the Response tab) to open the Personalisation Variables modal. This shows the tokens you can insert into your text and email content:
Click Copy next to any variable to copy it to your clipboard, then paste it into your text fields.
- For Leads (the referred person): {First Name}
- For Referrers: {Referrer First Name}
Adding the form to the Branded Referrer Portal
You can also add a lead submission button directly inside the Branded Referrer Portal. In the portal builder, the Submit Leads Button block is available under Buttons in the Add Blocks panel. When added to the Dashboard page, referrers can submit a friend's details without leaving the portal. See How to create and use a branded referral portal for details.
When a referrer submits a lead
When a referrer submits a friend's details, the lead appears in your Leads tab attributed to that referrer, just as if the friend had clicked the referral link themselves. If Email Notifications are enabled, the referred person also receives the configured notification email.