
Need help applying this to your account?
Contact support and we will keep this article attached to your request.
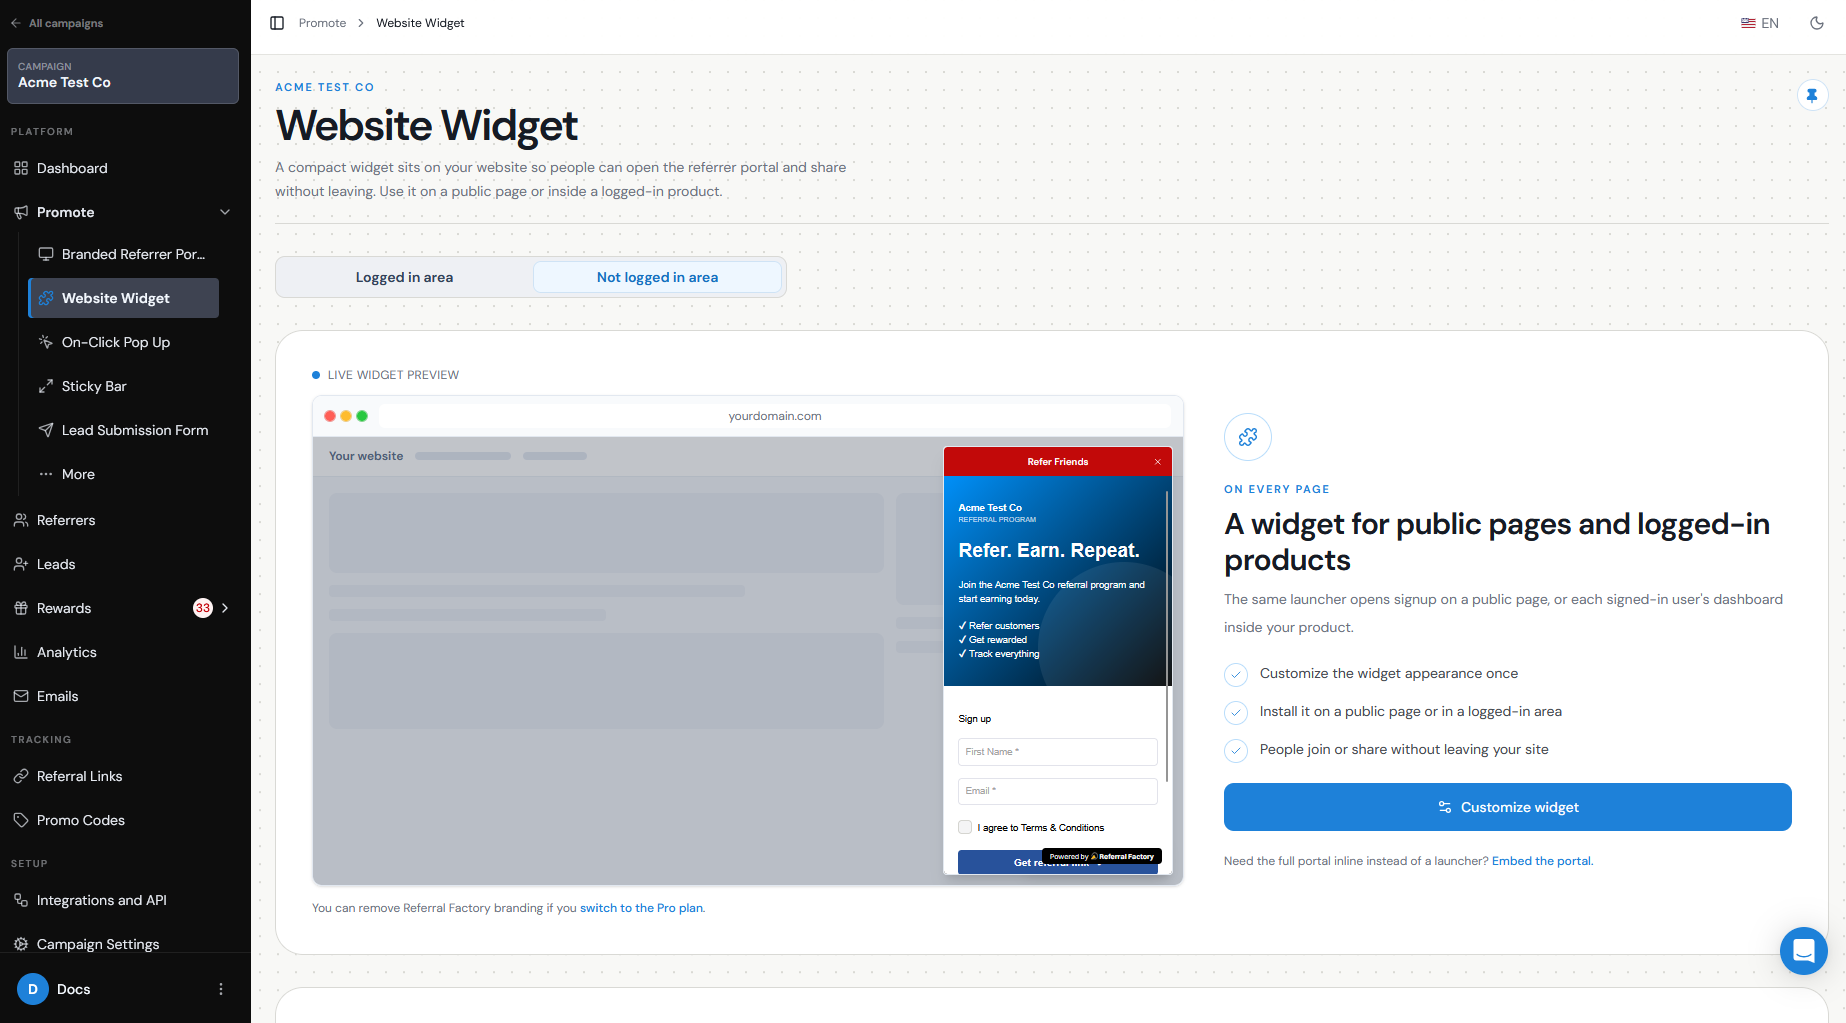
The Website Widget adds a floating referral button to your website. When someone clicks it, your Branded Referrer Portal opens as an overlay, allowing customers to join your referral program or access their existing referral account without leaving your site.
What the Website Widget is
The Website Widget is a floating button that sits on top of your website and gives customers an easy way to access your referral program.
When clicked, it opens the Branded Referrer Portal over the current page.
For example:
Customer visits your website → Clicks “Refer Friends” → Branded Referrer Portal opens → Customer signs up or logs in → Customer accesses their Referral Link
When to use it
Use the Website Widget when you want your referral program to be visible and easily accessible from your website without requiring customers to navigate to another page.
You can install it on a specific page or across your entire website. Installing it site-wide is useful when you want customers to be able to access the referral program wherever they are on your site.
For example, you could use the widget on your:
- Homepage
- Customer account area
- Product pages
- Post-purchase pages
- Support or resource pages
How it appears to visitors
The Website Widget appears as a floating button on the page.
You can choose whether the button displays:
For example, the button could display:
Refer Friends
When the visitor clicks it, the Branded Referrer Portal opens as an overlay without taking them away from your website.
- Logo + label
- Label only
- Logo only
Installation/configuration steps
To configure the Website Widget:
If Website Widget is not visible in the sidebar, you can enable it from Promote and clicking on More Options
- Go to Promote.
- Open the Website Widget
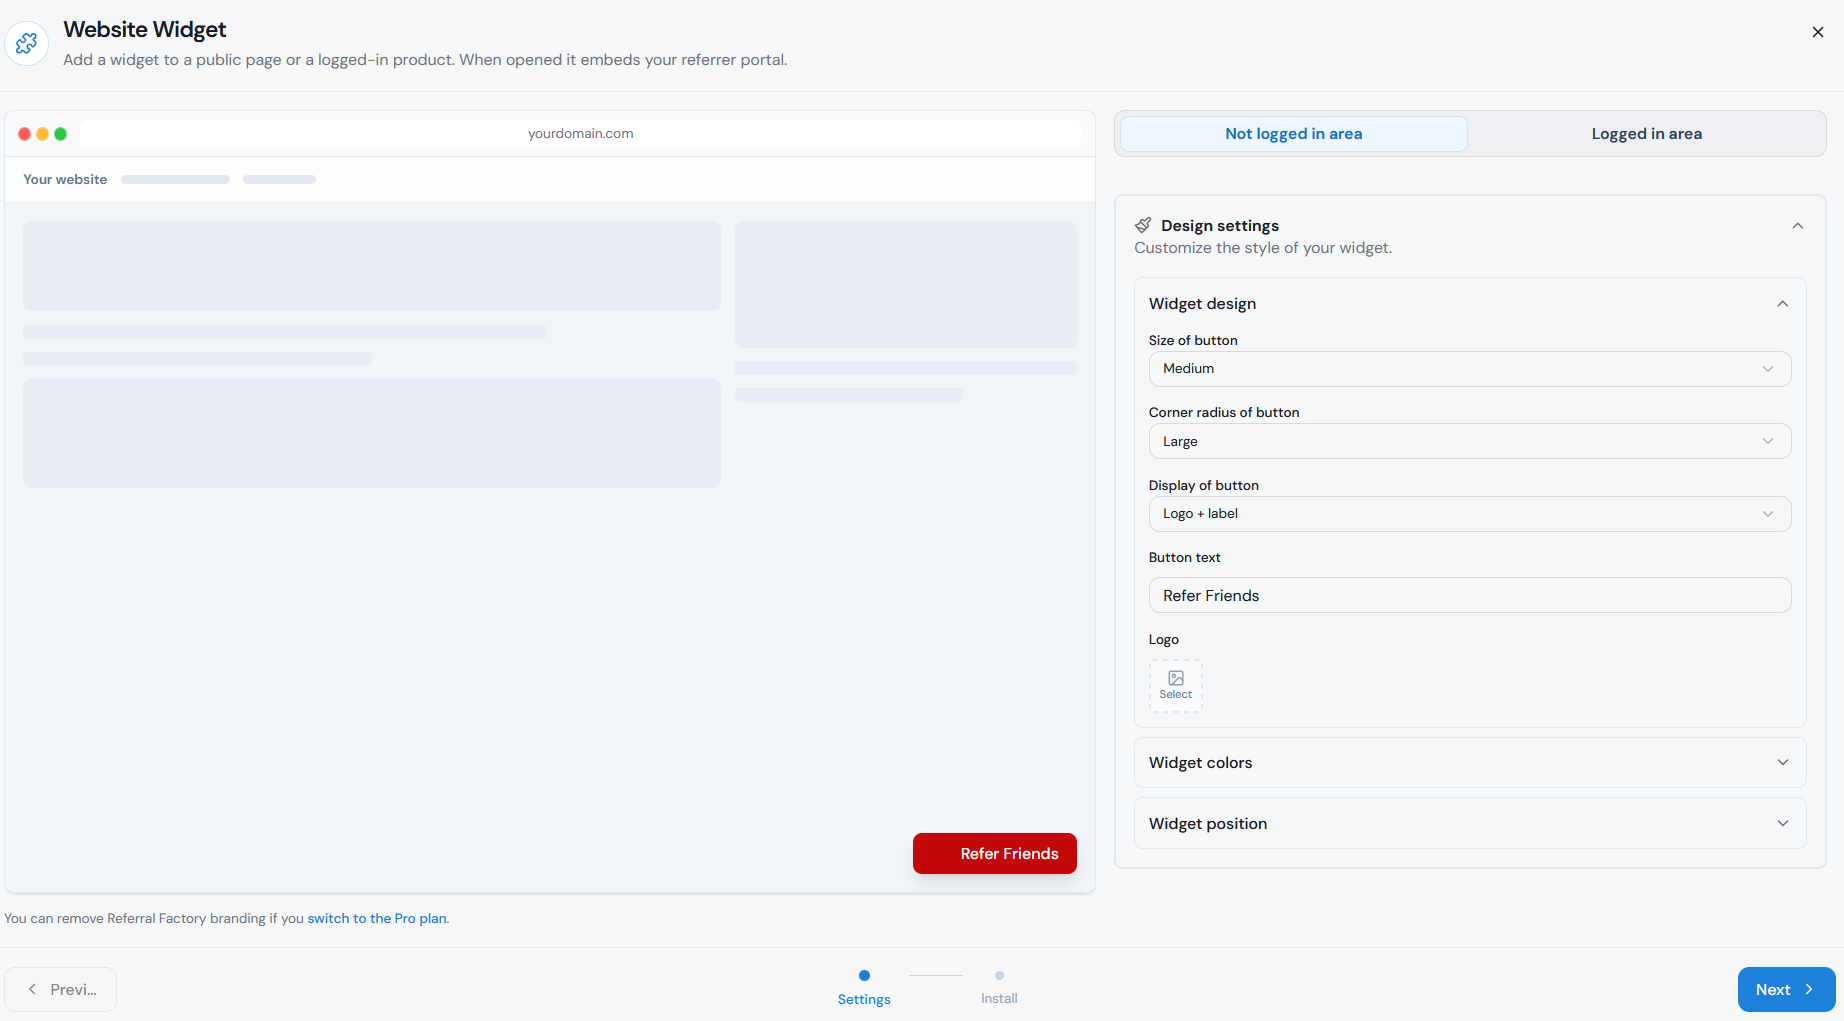
- Under Customize Widget, customize how the widget should look and where it should appear.
- Use the live preview to check your changes.
- Click Next
- Copy the JavaScript snippet provided.
- Add the script to your website before the closing </body> tag.
- Publish your website changes.
- Open your website and test the widget.
Branding and behavior options
Under Design settings, you can customize the Widget to match your website.
You can configure:
Use the preview to make sure the Widget is noticeable without covering important content on your website.
- Size of button — Small, Medium, or Large.
- Corner radius of button — None, Small, Medium, or Large.
- Display of button — Logo + label, Label only, or Logo only.
- Button text
- Logo
- Background color
- Text color
- Position on page
- Corner
- Inset — how far the button sits from the edge of the page.
Attribution
The Website Widget helps customers join or access your referral program as Referrers.
When a new customer signs up through the Branded Referrer Portal opened by the Widget, Referral Factory creates them as a Referrer and generates their unique Referral Link.
They can then share that link with friends:
Customer joins as Referrer → Unique Referral Link generated → Referrer shares link → Lead submits their details → Lead is attributed to that Referrer
The Website Widget itself is therefore an entry point for your Referrers; referral attribution happens through the unique Referral Links they share.
Mobile/testing
Always test the Widget on both desktop and mobile before promoting it to customers.
Check that:
If you installed the Widget site-wide, test several different pages rather than only your homepage.
- The Widget is visible on the pages where you installed it.
- The button does not cover important content.
- Its size and position work well on different screen sizes.
- Clicking it opens the correct Branded Referrer Portal.
- A new Referrer can sign up successfully.
- An existing Referrer can access their referral experience.
- The generated Referral Link works correctly.
Developer requirements
The Website Widget requires a JavaScript snippet to be added to your website.
The provided code contains the campaign configuration and loads the Referral Factory Website Widget. No API or backend integration is required for the standard setup.
If you can edit your website code, you can add the script yourself. Otherwise, send the script from the Install step to the person or team that manages your website.
Common troubleshooting
If the Website Widget does not appear or work correctly, check that:
If the Widget appears but opens the wrong referral experience, return to the Website Widget configuration and confirm that you are editing and installing the Widget for the correct campaign.
- The entire JavaScript snippet was copied.
- The script was added before the closing </body> tag.
- Your website changes were published.
- The Widget is enabled in Referral Factory.
- You are testing the correct campaign.
- Your browser or website cache is not showing an older version of the page.
- Another website element is not covering the Widget.