
Need help applying this to your account?
Contact support and we will keep this article attached to your request.
What is the Branded Referrer Portal?
The Branded Referrer Portal is the referrer-facing experience for a campaign. You build its Sign Up, Login, and Dashboard pages in Referral Factory, then promote the finished portal to existing customers. The Dashboard can be configured to show a referral link, a Stripe promo code, or both.
How do I create and customise the Branded Referrer Portal?
Select the campaign you want to configure first. Then open Promote and select Branded Referrer Portal. On the portal page, select Customize portal pages to open the builder.
The builder has a live preview, a page switcher for Sign Up, Login, and Dashboard, and two editing areas: Design and Add Blocks. Configure the pages in that order so the joining, returning, and post-sign-up experiences work together.
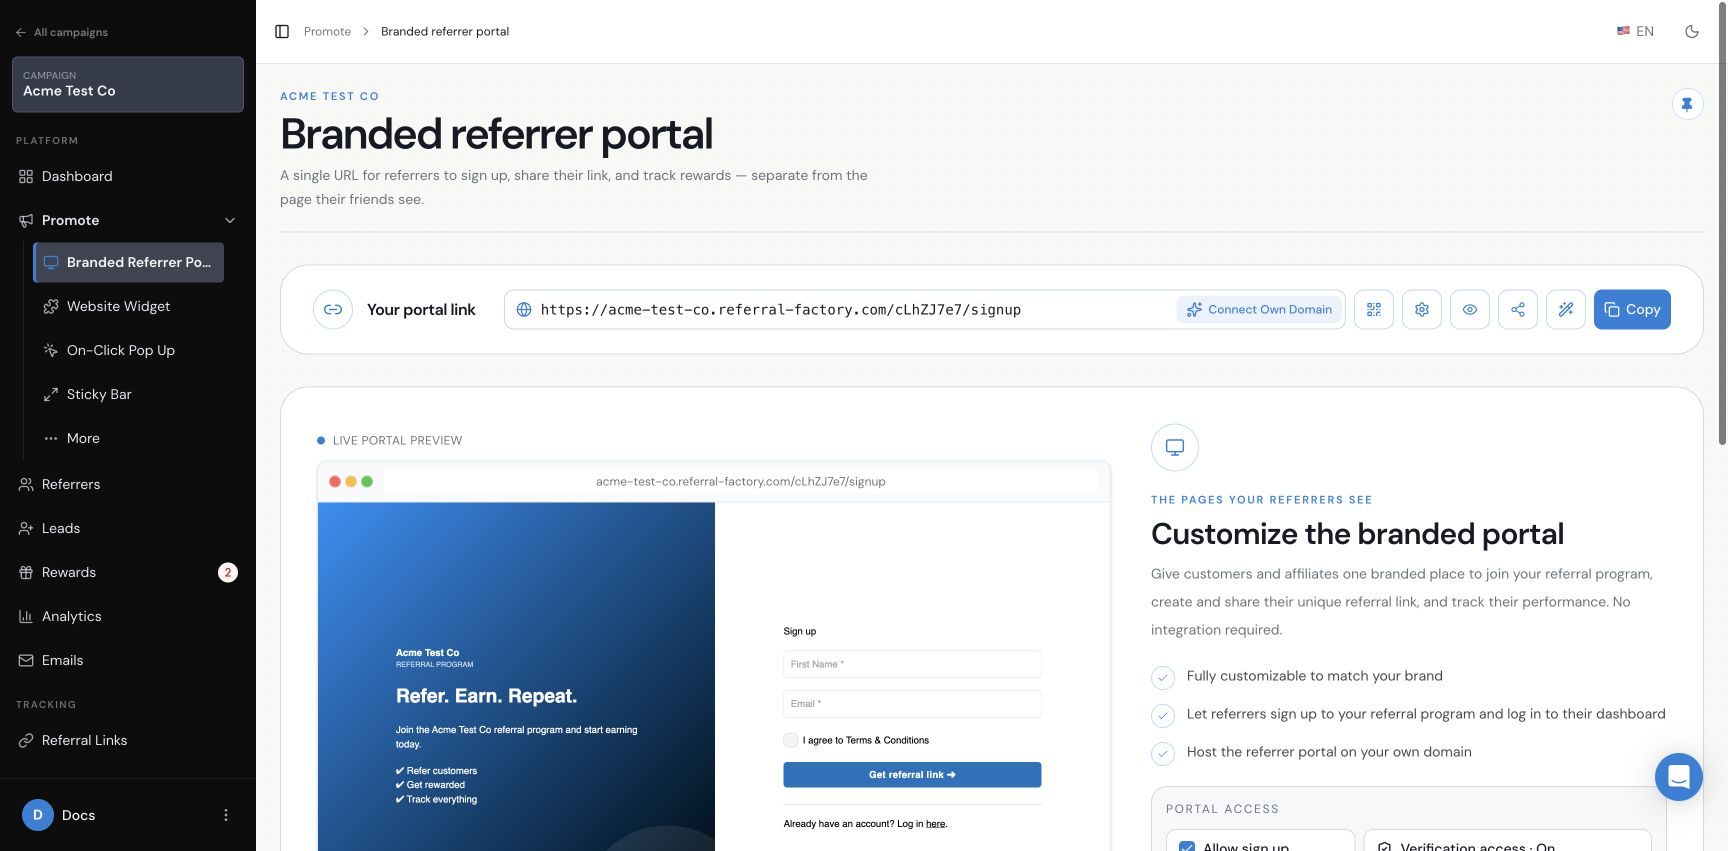
The Branded referrer portal page is the starting point for the portal URL, access control, preview, and customization.
Configure the Sign Up page
Use Sign Up to control how a new referrer joins and receives referral access.
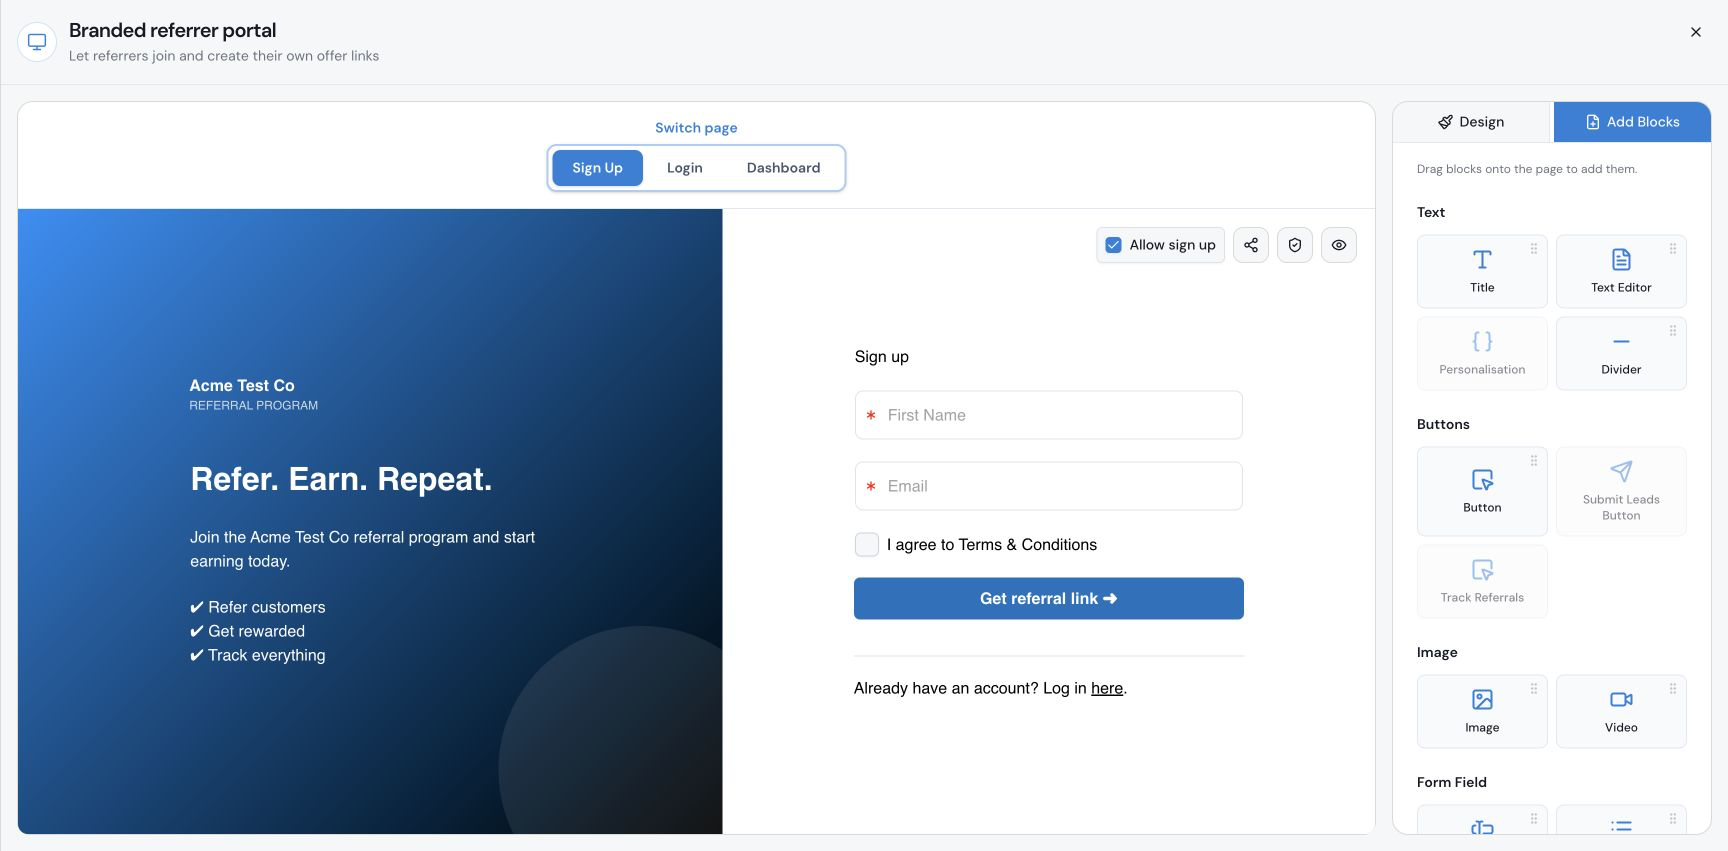
The Sign Up page shows the registration preview alongside the Design and Add Blocks controls.
- Select Sign Up in the builder page switcher.
- Use Design to change the layout, logo, background, container, title, text, button, form-field styling, images, and links shown in the available panels.
- Open Add Blocks to add content such as Title, Text Editor, Personalisation, Divider, Button, Image, or Video.
- Add or edit the registration fields you need. The available field types include Input Field, Select Field, CRM Field, Number Field, URL Field, Date Field, Datetime Field, and Multiple Select Field.
- Review the heading, description, terms and conditions, sign-up button, and login link in the preview.
- On the Branded referrer portal page, keep Allow sign up enabled when people should be able to register themselves.
Configure the login page
Use Login to control how an existing referrer returns to the portal.
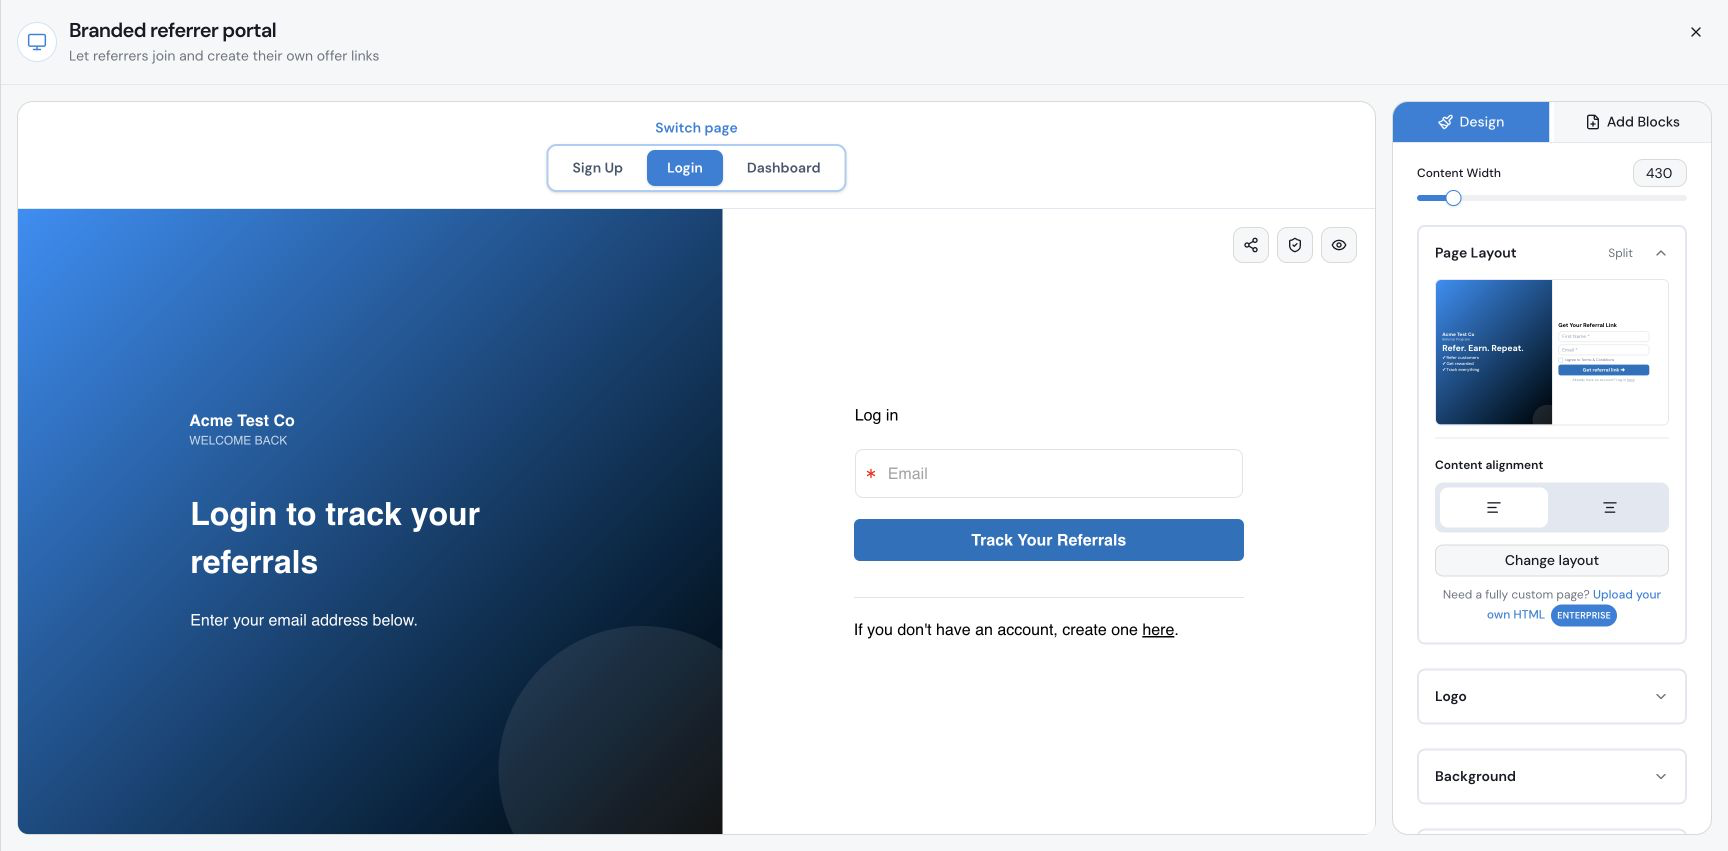
The Login page is configured separately for returning referrers.
- Select Login in the builder page switcher.
- Use Design to change the Login page layout, branding, background, title, text, form styling, button, image, and link settings.
- Use Add Blocks to add supported explanatory or branded content without changing the registration form.
- Review the email field, Track Your Referrals button, and sign-up link in the preview.
- On the Branded referrer portal page, review Verification On Login if returning referrers should complete the configured verification step.
Configure the dashboard page
Use Dashboard to control what a referrer sees after joining or logging in. This is where you choose whether the referrer receives a referral link, a Stripe promo code, or both, as well as the tracking and sharing tools around those assets.
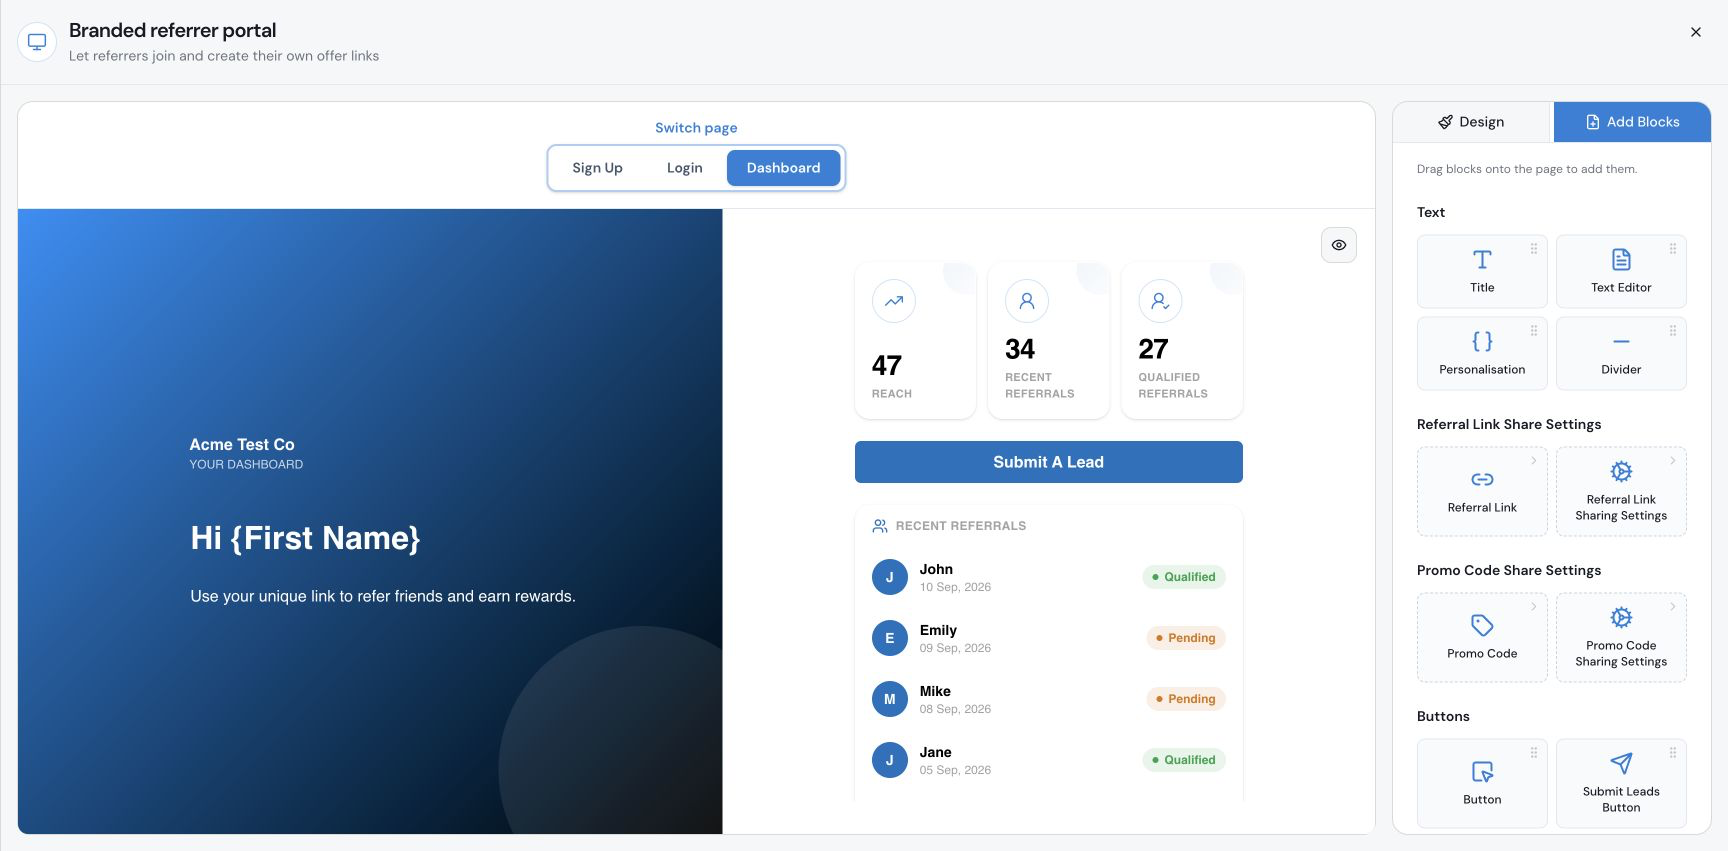
The Dashboard Add Blocks panel shows the referral-link and promo-code sharing controls alongside tracking blocks.
- Select Dashboard in the builder page switcher.
- Use Design to adjust the Dashboard logo, background, container, title, text, buttons, images, and links.
- Open Add Blocks to add or arrange supported content for the referrer experience.
- Use the Referral Link and Referral Link Sharing Settings blocks when referrers should receive and share a unique referral link. Use the Promo Code and Promo Code Sharing Settings blocks when Stripe promo codes are part of the experience.
- Use the Copy Button and Socials blocks for the sharing actions you want to offer. Use the Tracking blocks to show referrals, conversion rate, leaderboard, rewards, and reach or conversion statistics.
- Review the personalised greeting, configured referral asset or assets, copy or share actions, QR code where applicable, statistics, recent referrals, and rewards in the preview.
- If your campaign accepts offline leads, confirm that the Submit A Lead button is included in the dashboard experience.
Choose the referral assets and sharing controls
Use the Dashboard blocks to decide what referrers receive and share. Referral links do not require Stripe. Promo codes require Stripe and must already be configured for the campaign; this guide only explains how to display them in the portal.
- For a link-only portal, open Dashboard → Add Blocks and add Referral Link. Add Referral Link Sharing Settings to configure the link preview and sharing message, then add Copy Button or Socials for the sharing actions you want to offer.
- For a promo-code-only portal, after Stripe and Promo Codes have been configured for the campaign, add Promo Code and Promo Code Sharing Settings. Do not add the referral-link blocks if you do not want the link shown.
- For a combined portal, add Referral Link, Referral Link Sharing Settings, Promo Code, and Promo Code Sharing Settings. Add Copy Button or Socials where they support the sharing experience.
- Check the live Dashboard preview after adding or removing blocks. For Stripe setup, coupon configuration, code generation, and redemption rules, see the dedicated Stripe promo-code guide.
What happens after a Referrer signs up?
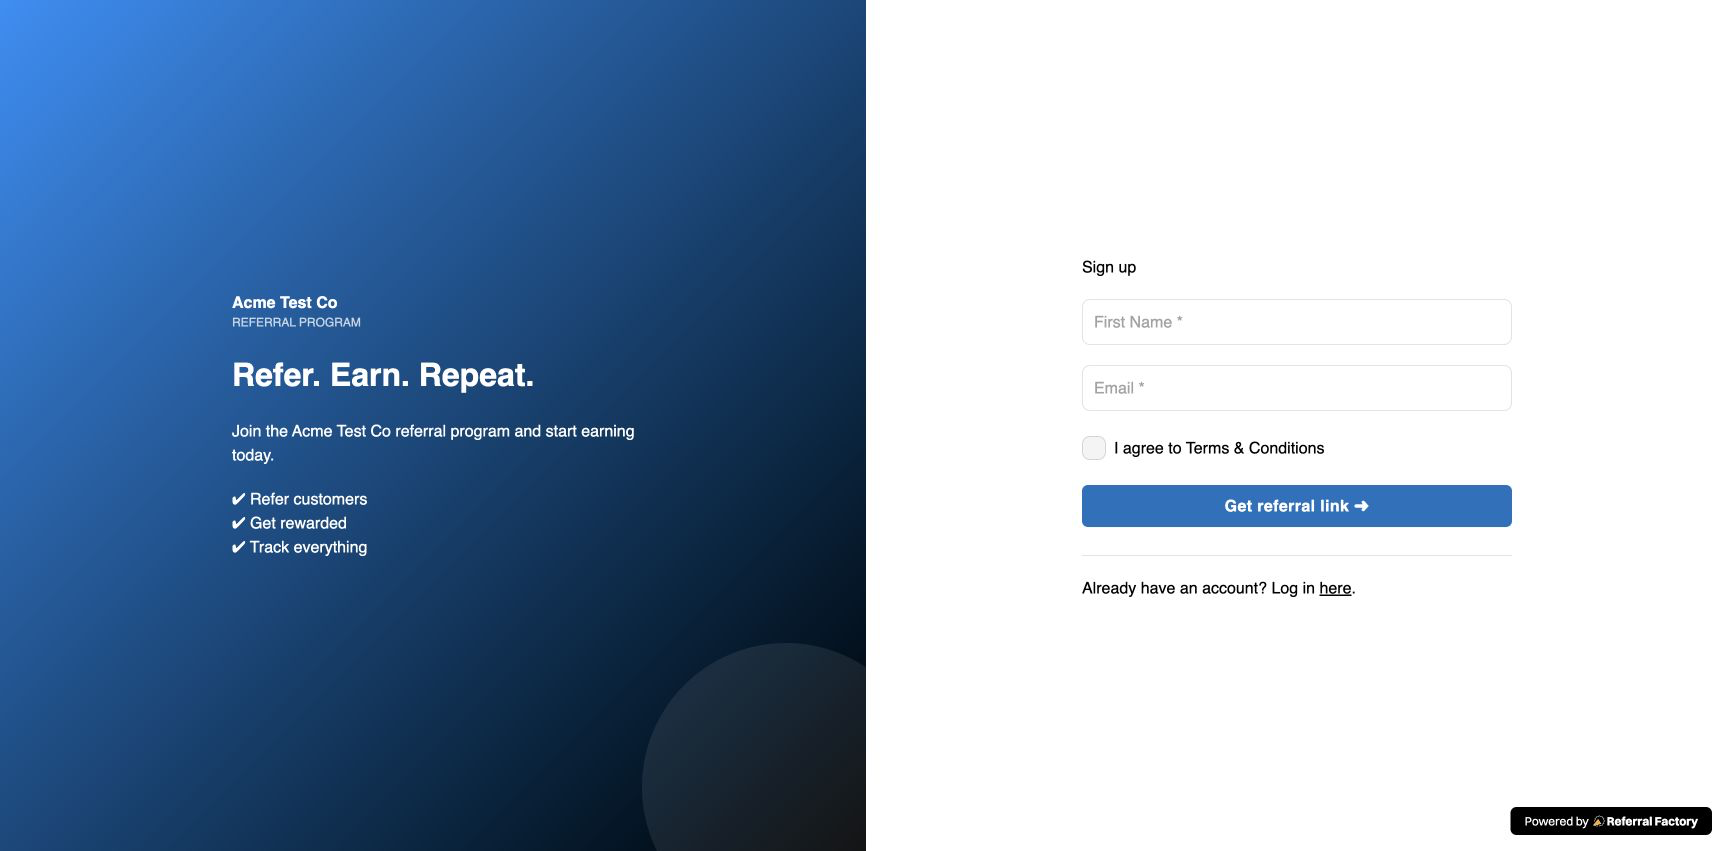
Share the portal sign-up URL shown on the Branded referrer portal page. When Allow sign up is enabled, a new referrer completes the fields you configured and selects the sign-up button. After registration, Referral Factory opens the configured Dashboard. A link-only setup shows the unique referral link; a Stripe promo-code-only setup shows the configured promo-code asset; and a combined setup can show both. Check the live preview and complete a test registration to confirm the exact wording and assets in your configuration. If a referrer welcome email is enabled, it may also contain the configured referral asset or joining instructions.
A new referrer completes the configured fields and selects Get referral link to join the campaign.
What can Referrers see and do inside the portal?
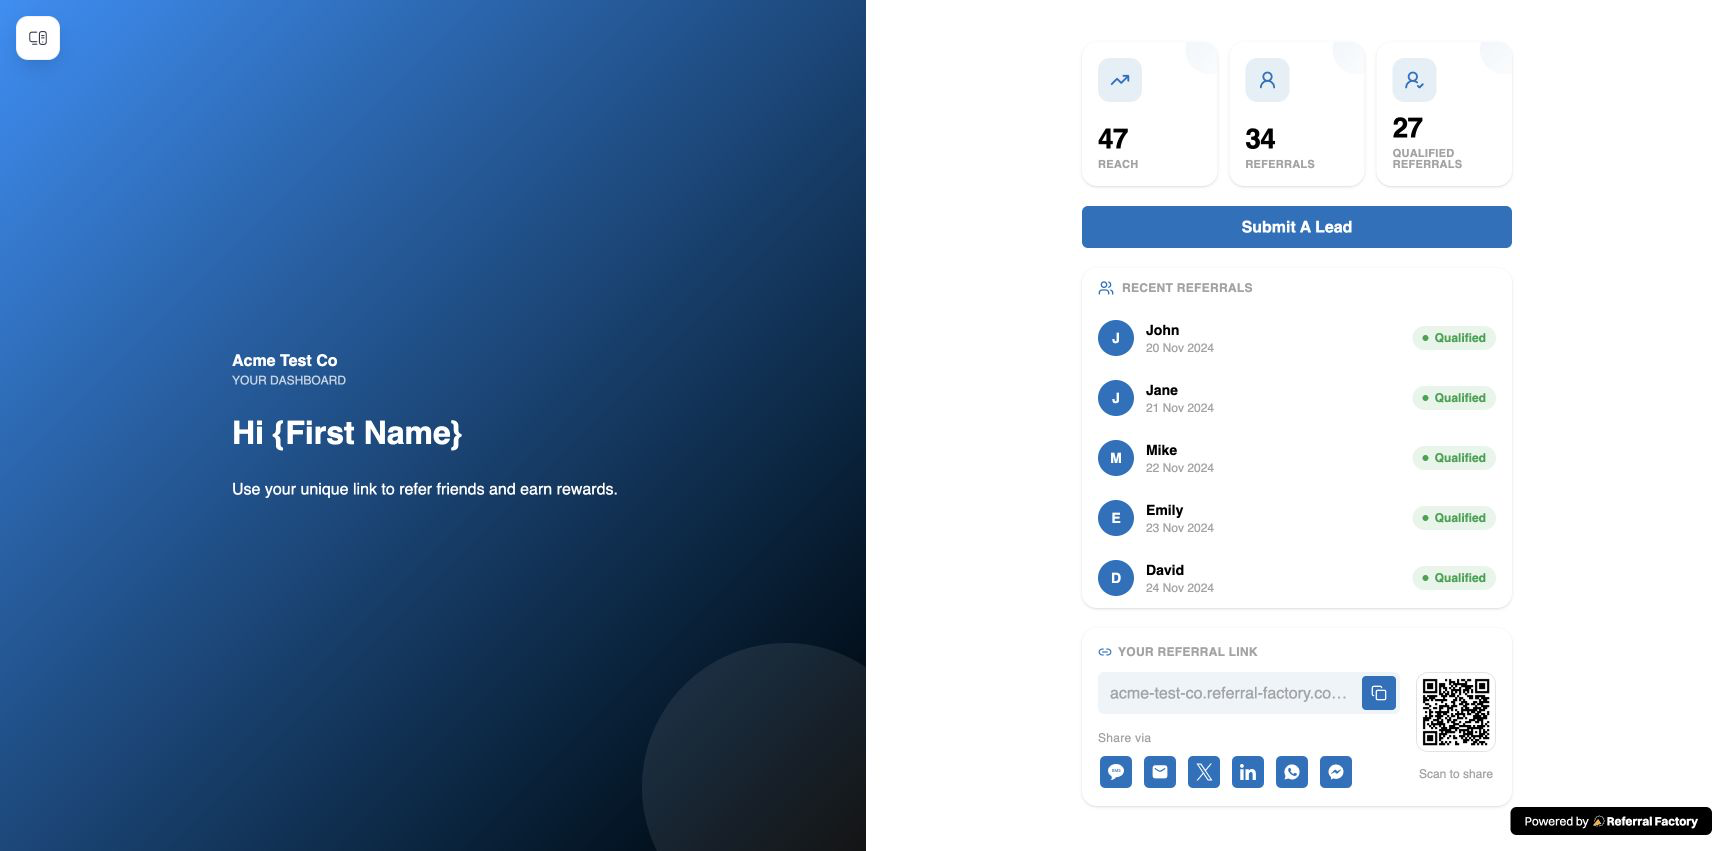
The Dashboard shows the blocks you configure, including the referral link, Stripe promo code, or both, together with their sharing actions. It can also show a QR code where applicable, referral statistics, recent referral activity, and reward information. If you have enabled lead submission, it can include Submit A Lead.
This example Dashboard shows a configured referral link, sharing tools, activity, and reward information.
How do returning Referrers log back into the portal?
Returning referrers use the same portal URL and select the login option. They enter the email address associated with their referral record. If Verification On Login is enabled, Referral Factory applies the configured verification step before opening the Dashboard.
How can I white-label the portal and use my own domain?
On the Branded referrer portal page, select Connect Own Domain and follow the instructions for the domain or subdomain you control. You may need to add DNS records with your domain provider. Availability can depend on your Referral Factory plan, so confirm the option shown in your account. This changes the portal address and is separate from a custom domain used for campaign referral links.
How do I make the portal available to Referrers?
Choose the deployment method that matches your customer journey. The standalone portal and the embedded options are separate ways to expose the same configured Sign Up, Login, and Dashboard experience.
Referral Factory provides the portal URL, page builder, and Embed Portal instructions. The exact placement, authenticated-user handoff, domain allow-listing, and any product-side JavaScript work are implemented in your website or product environment, so involve the person responsible for that environment. Do not publish an embed until the final placement and access rules have been tested.
- Standalone portal: on the Branded referrer portal page, copy the portal URL or use the QR code, then share it from your website, email, QR materials, or customer communications. This is the simplest option because Referral Factory hosts the portal.
- Embedded on a public website: open Promote → Embed Portal, select Not logged in area, choose the public-page option, and copy the snippet or token instructions. Paste the supplied implementation into the public page, configure the allowed domain or domains, and publish the page. Use Customize: Public website and Customize: Snippet and domains when those controls are needed for the placement.
- Embedded inside a logged-in product or customer portal: open Promote → Embed Portal, select Logged in area, and copy the snippet or token instructions for the authenticated area. Your product or engineering team places the embed inside the logged-in experience and publishes it. Use Customize: Logged-in product for that presentation. The signed-in customer should see their own referrer experience rather than a shared account.
How do I test the complete portal experience?
Use dummy details and test the complete journey before sharing the portal.
Do not use real customer data or distribute the test link and test activity as a live campaign.
Step 1
Open the portal sign-up URL in a private or separate browser window.
Step 2
Confirm that the Sign Up page shows the intended branding, fields, terms, and sign-up button. Verify the wording shown in your configured campaign.
Step 3
Register a dummy referrer and confirm that the Dashboard opens with the expected referral asset: link only, promo code only, or both. Check the corresponding share settings, Copy Button or Socials blocks, QR code where applicable, activity, rewards, and Submit A Lead option if enabled.
Step 4
Return to the portal URL and use Login with the same dummy referrer details.
Step 5
Confirm that Verification On Login behaves as configured and that the referrer returns to the correct Dashboard.
Step 6
Test the configured referral path: open the referral link, or, if promo codes are enabled, follow the dedicated Stripe promo-code guide for the code test. Confirm that the resulting activity is attributed to the dummy referrer and that the referrer sees the expected asset in the Dashboard.
Step 7
Repeat the checks in the final standalone, public-website, or logged-in-product placement you plan to use. For an embedded portal, test both a public visitor and a second dummy signed-in customer so the correct access and personalisation are confirmed.