
Read this page as a quick path: scan the headings, use the step blocks, and escalate if the expected result does not happen.
Need help applying this to your account?
Contact support and we will keep this article attached to your request.
The website widget adds a floating button to your website (e.g. in the bottom-right corner). When visitors click the button, it opens your Branded Referrer Portal as an overlay — letting them sign up, get their referral link, and track their referrals without leaving your site.
Accessing the widget configuration
There are two ways to open the Website Widget settings:
The configuration has two steps: Settings (design the button) and Install (get the code). Use the Next and Previous buttons at the bottom to move between steps.
- From the Promote page — Click the Website Widget card, then click Website Widget Configuration.
- From the sidebar — Go to Onboard Referrers → Website Widget. If you don't see it in the sidebar, you can enable it from the Promote page using the eye icon on the Website Widget card.
Step 1: Settings
The Settings step lets you customise the appearance and position of the widget button. The left side shows a live preview of how the button will look on your website. All options are under Design settings.
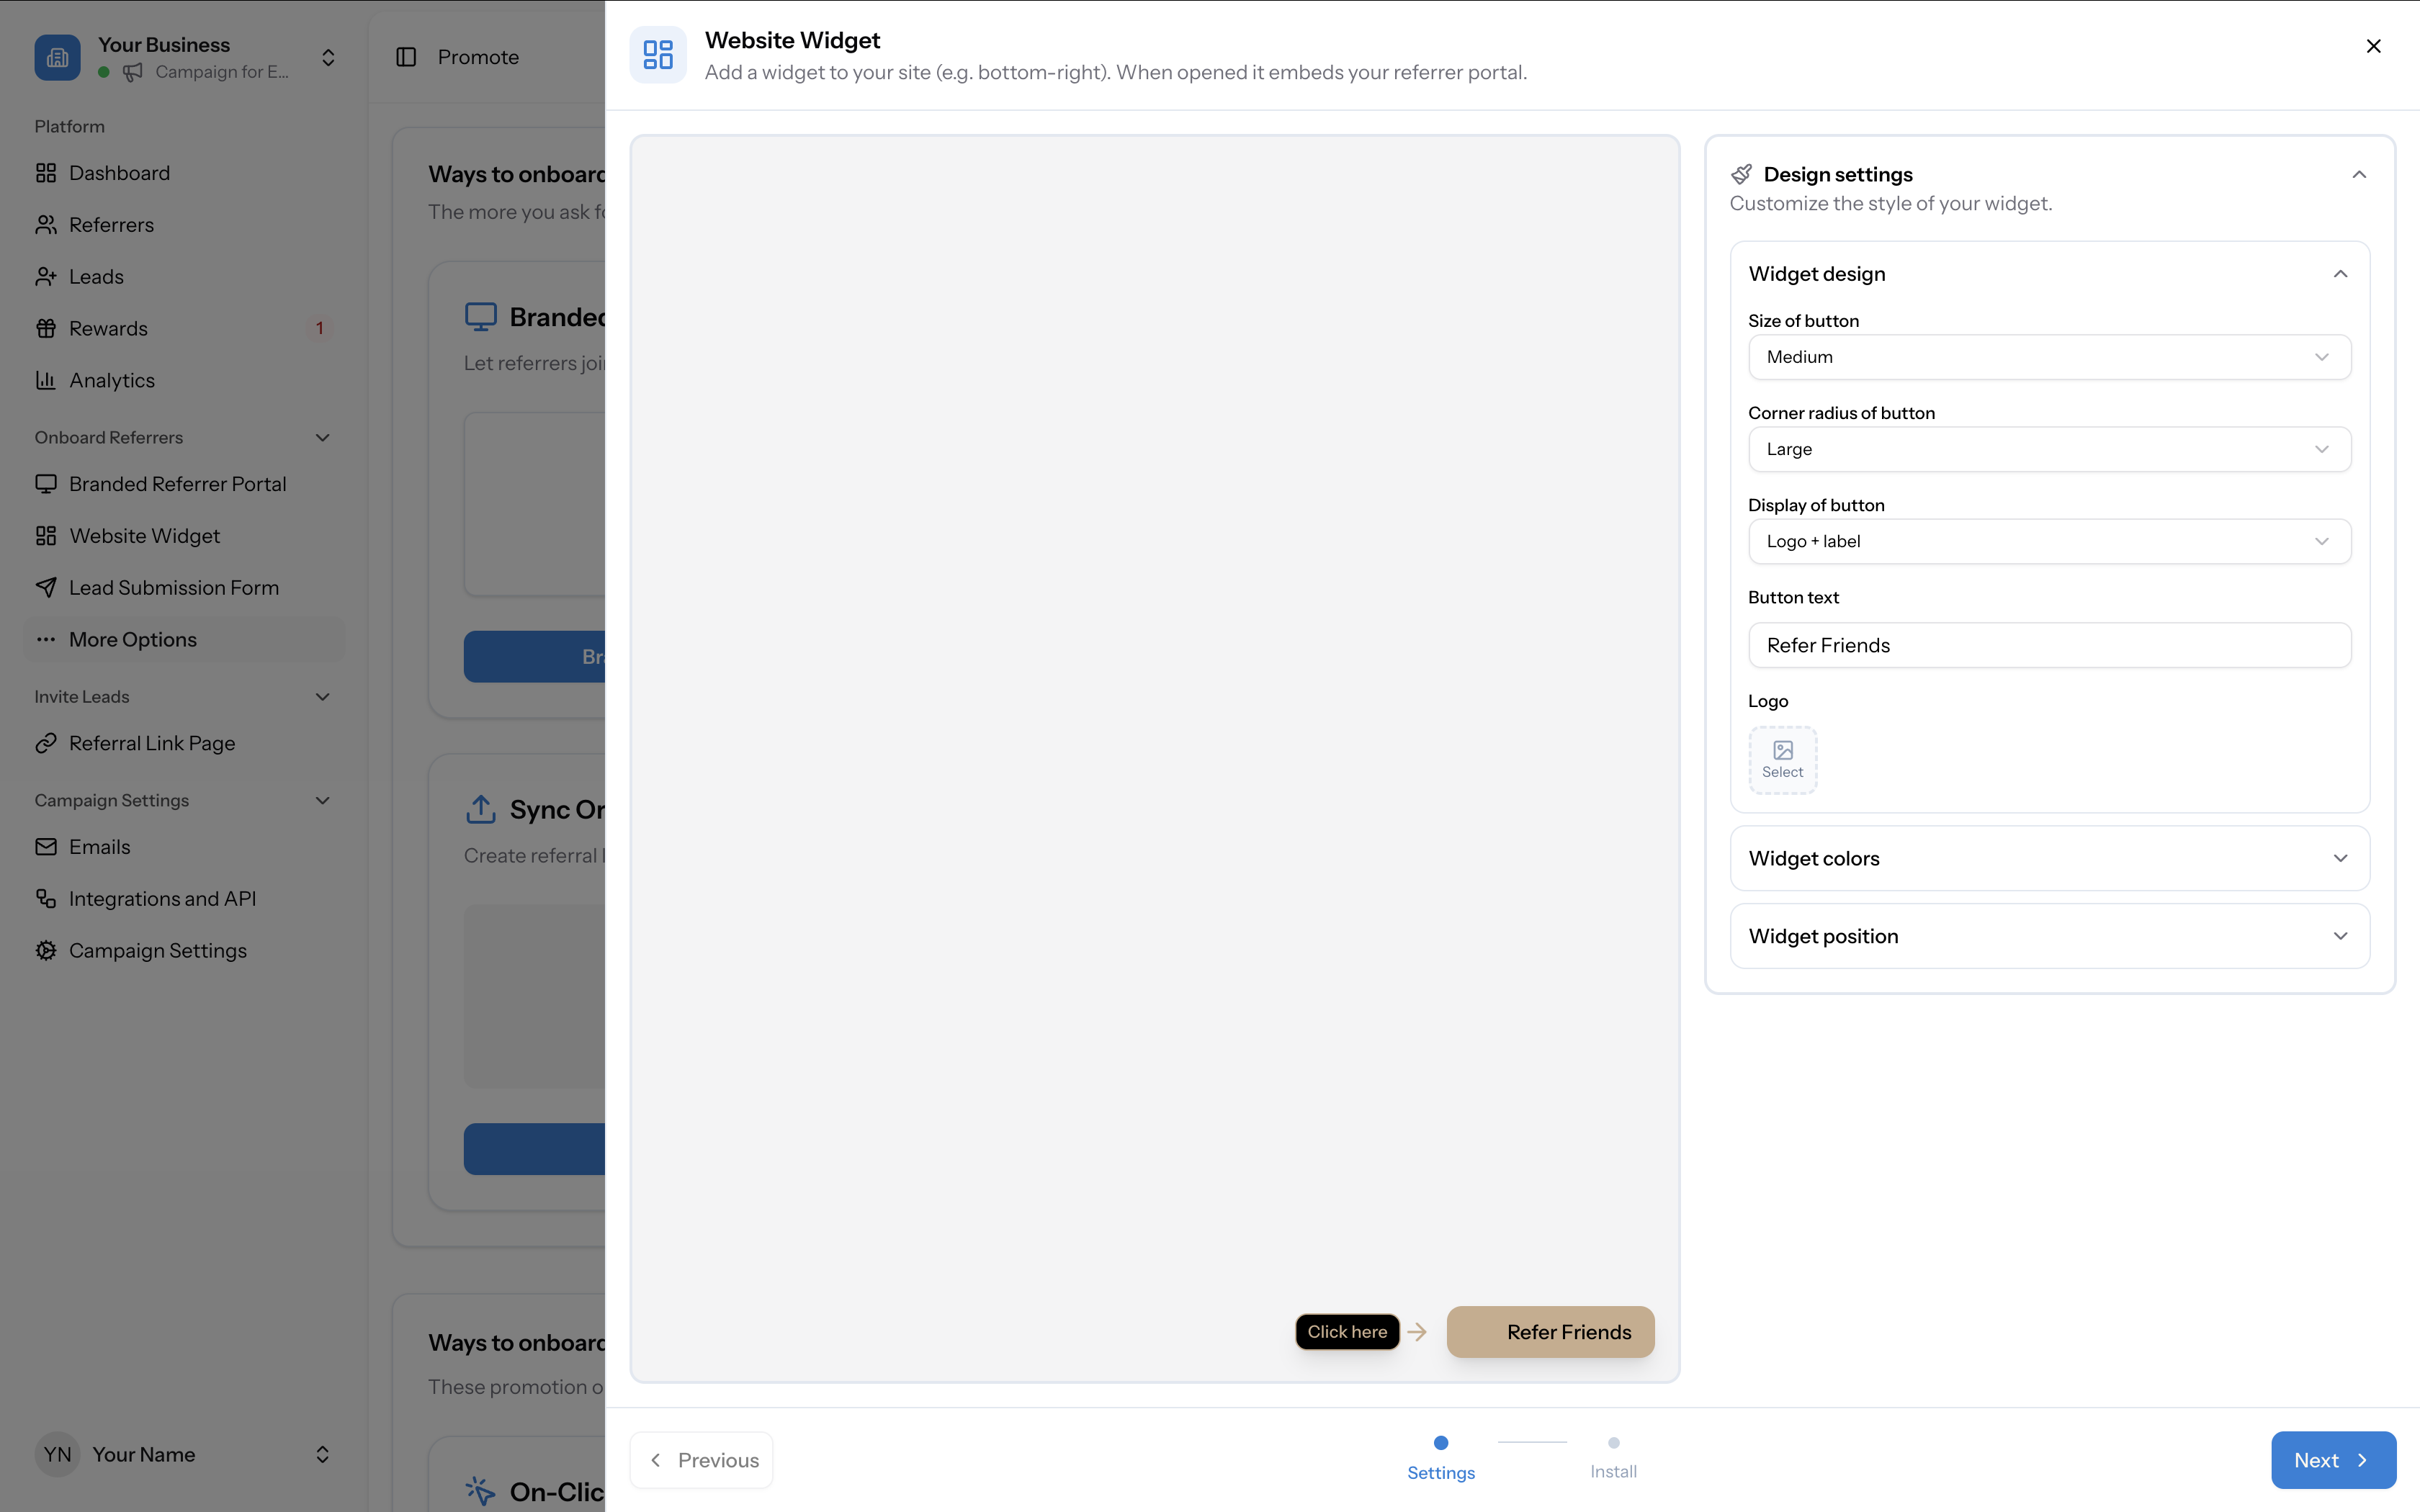
Widget design
- Size of button — choose from Small, Medium, or Large
- Corner radius of button — choose from None, Small, Medium, or Large
- Display of button — choose what the button shows: "Logo + label", "Label only", or "Logo only"
- Button text — the label on the button (e.g. "Refer Friends")
- Logo — select or upload a logo icon for the button
Widget colors
- Background color — the button's background colour (e.g. #C9AC8C)
- Text color — the button's text colour (e.g. #000000)
Widget position
- Position on page — where the button appears (e.g. "Corner")
- Corner — which corner to place the button (e.g. "Bottom right")
- Inset — how far the button sits from the edge of the screen (Small, Medium, or Large)
Step 2: Install
Click Next to move to the Install step. This provides the code to add the widget to your website.
Add the script to your website
Copy the JavaScript snippet provided and paste it into your website's HTML before the closing
</body> tag. The snippet includes:No API call or backend integration is required — just paste the code and the widget button will appear on your site.
- A configuration block that sets your campaign code via
window.referralFactory.websiteWidget - A script tag that loads the Referral Factory widget
Tip
Install the widget site-wide so the floating button appears on every page.